Our "Paranormal" Specific Equipment
Our "Paranormal" Specific Equipment
The Why and How to Use Them
The Why and How to Use Them
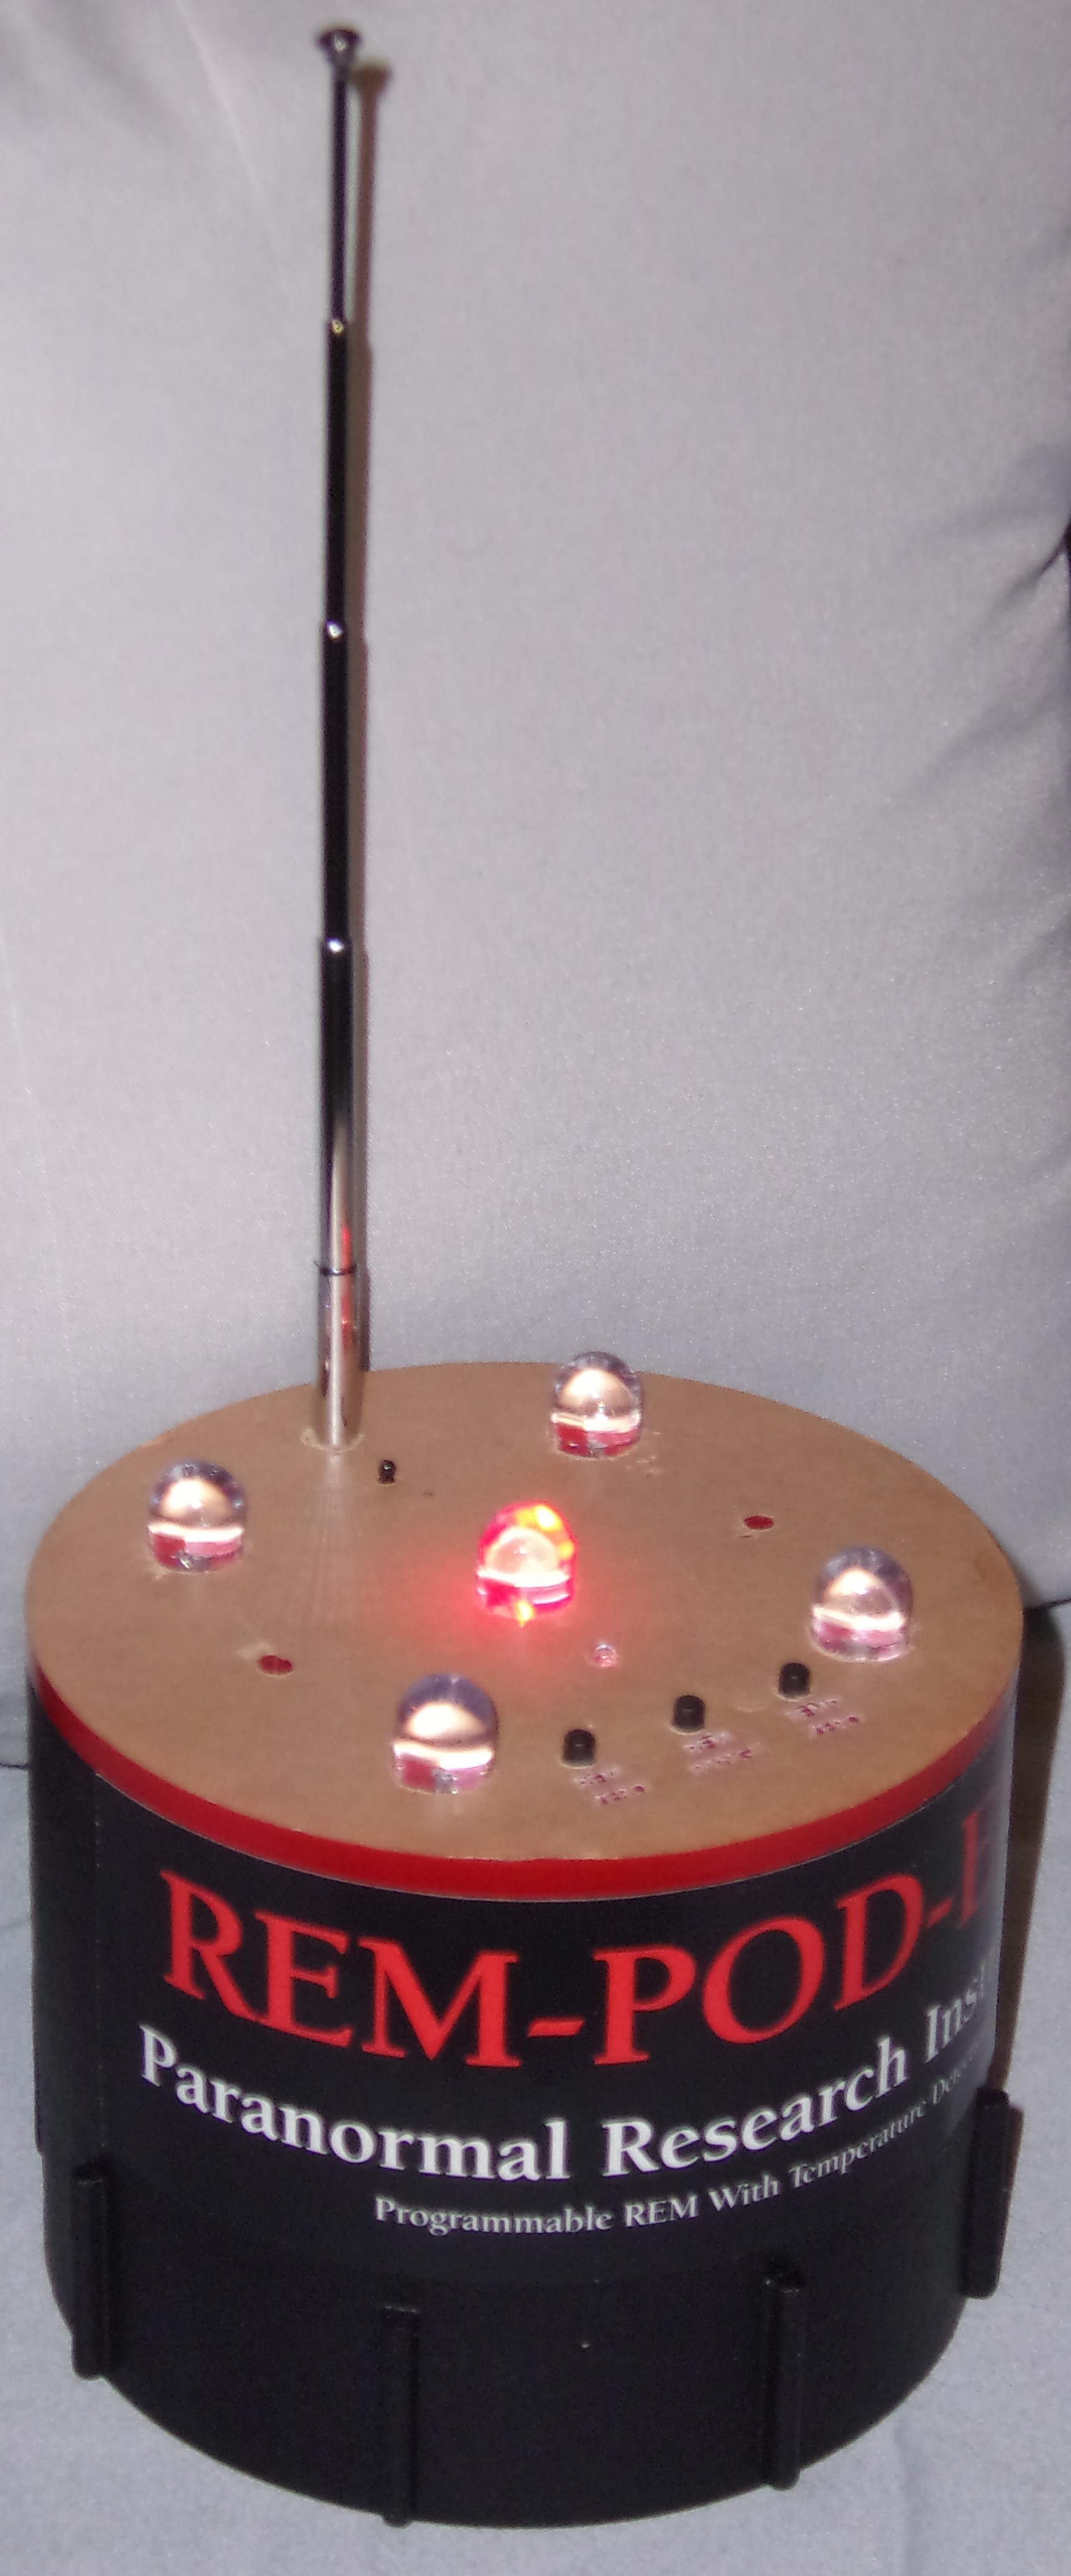
REM Pod
Theory behind the use of this equipment:
Uses the "Electromagnetic Field Theory".Characteristics:
When a spirit manifests it needs energy to do so. Some people believe that a spirit can draw the energy from a high electromagnetic filed (EMF) which can then cause it to manifest.
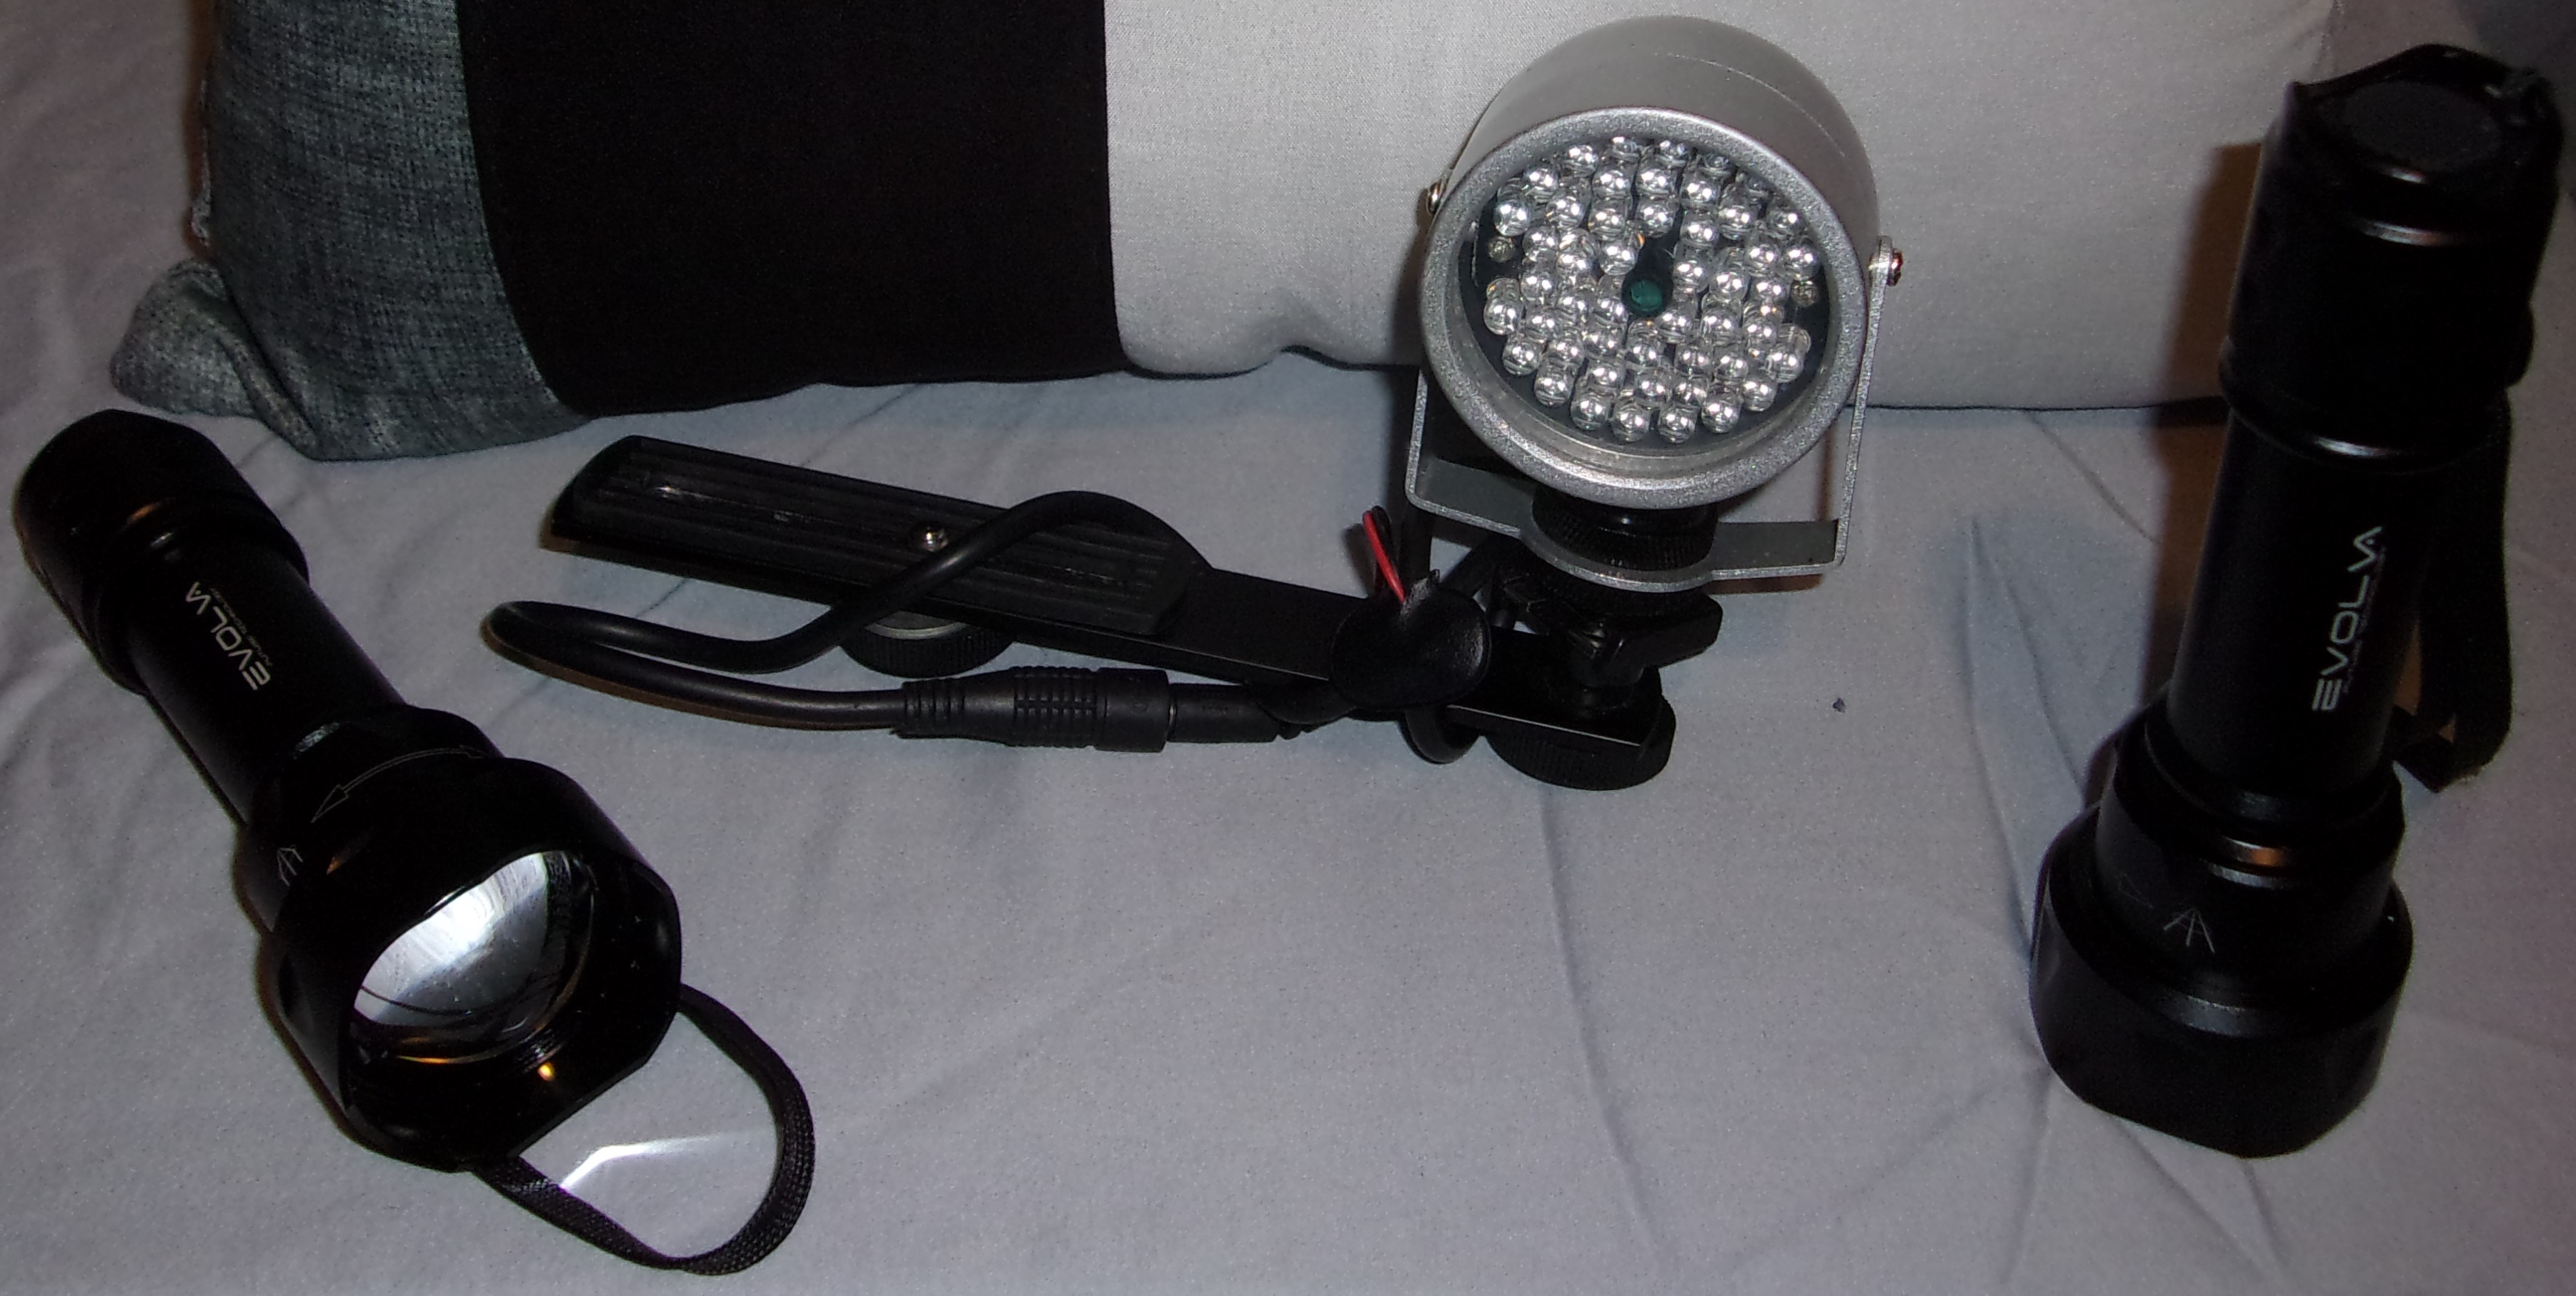
The "Radiating Electromagnetism", or REM, Pod radiates its own EMF from the telescopic antenna with a 360 field of coverage. The top has multicolored lights that will light up when something disrupts the EMF, and emits a sound as well. When turned on, the center red light will remain lit. It has three buttons on the top of the device.How to use:
1. Gently extend the telescopic antenna on top of the device.NOTE: The REM Pod with ATDD is still undergoing field testing to determine its value and practicality during investigations
2. On the bottom of the device there is a red button and REM ON/OFF switch. When turned on:
REM Pod will start emitting an EMF and will "boot-up" for a few seconds. It goes through a quick self-test diagnostic.3. Optional: There is a red ATDD (Ambient Temperature Deviation Detection) button on the bottom of the device, which switches temperature detection on and off.
The device will sound off if you are still holding it.
If held for too long, the device may continue to detect disturbance from the handler. It will turn off on its own.
The device runs through an "Auto Baseline" function approximately every seven seconds. This will allow it to adapt to any interferences that may be present.
This will only work if the REM Pod's main power is on.4. To adjust the REM field and strength, hit the REM RANGE button on top of the device. Lights will blink to acknowledge each new setting. Each press increases sensitivity by approximately 20%. The following shows each level with its corresponding light:
The temperature sensor is the little black knob adjacent to the antenna.
An LED on top of the pod turns red with "Ascending" tones for each "+" degree change, and a blue LED turns on with "Descending" tones for each "-" degree change.
Level 1 = Purple5. To test detection range, us hands and approach the antenna. Max range for your hands is approx. 5"-6".
Level 2 = Purple & Red
Level 3 = Purple, Red, & Blue
Level 4 = Purple, Red, Blue, & Yellow
Level 5 = Purple, Red, Blue, Yellow, & Green
Reason for your hand test is this: Humans give off a very slight EMF field that will be detected as a disturbance for the REM Pod.6. To manually set the Pod's baseline readings, hit REM ZERO and/or TEMP ZERO.
7. To turn off, just flick the REM ON/OFF switch.

360 Parascope
Theory behind the use of this equipment:
Uses the Static Electricity Theory.Characteristics:
The theory of use is that when a spirit manifests it will give off a static electric charge that can be picked up by a meter that detects static electricity.
Not to be confused with an EMF.
This piece's detection is directional, hence the "360" name, and each probe illuminates in one of many colors. It also emits a dull blue glow at all times so it is easily located in particularly dark places.How to use:
1. Push the diamond button to turn it on.NOTE: The 360 Parascope is still undergoing field testing to determine its value and practicality during investigations
2. It will glow blue. It takes a moment to warm-up.
3. Place it wherever monitoring/investigation is desired.
4. To turn it off, push the diamond button again. It will then glow green as it cools off. The green light will fade shortly after.
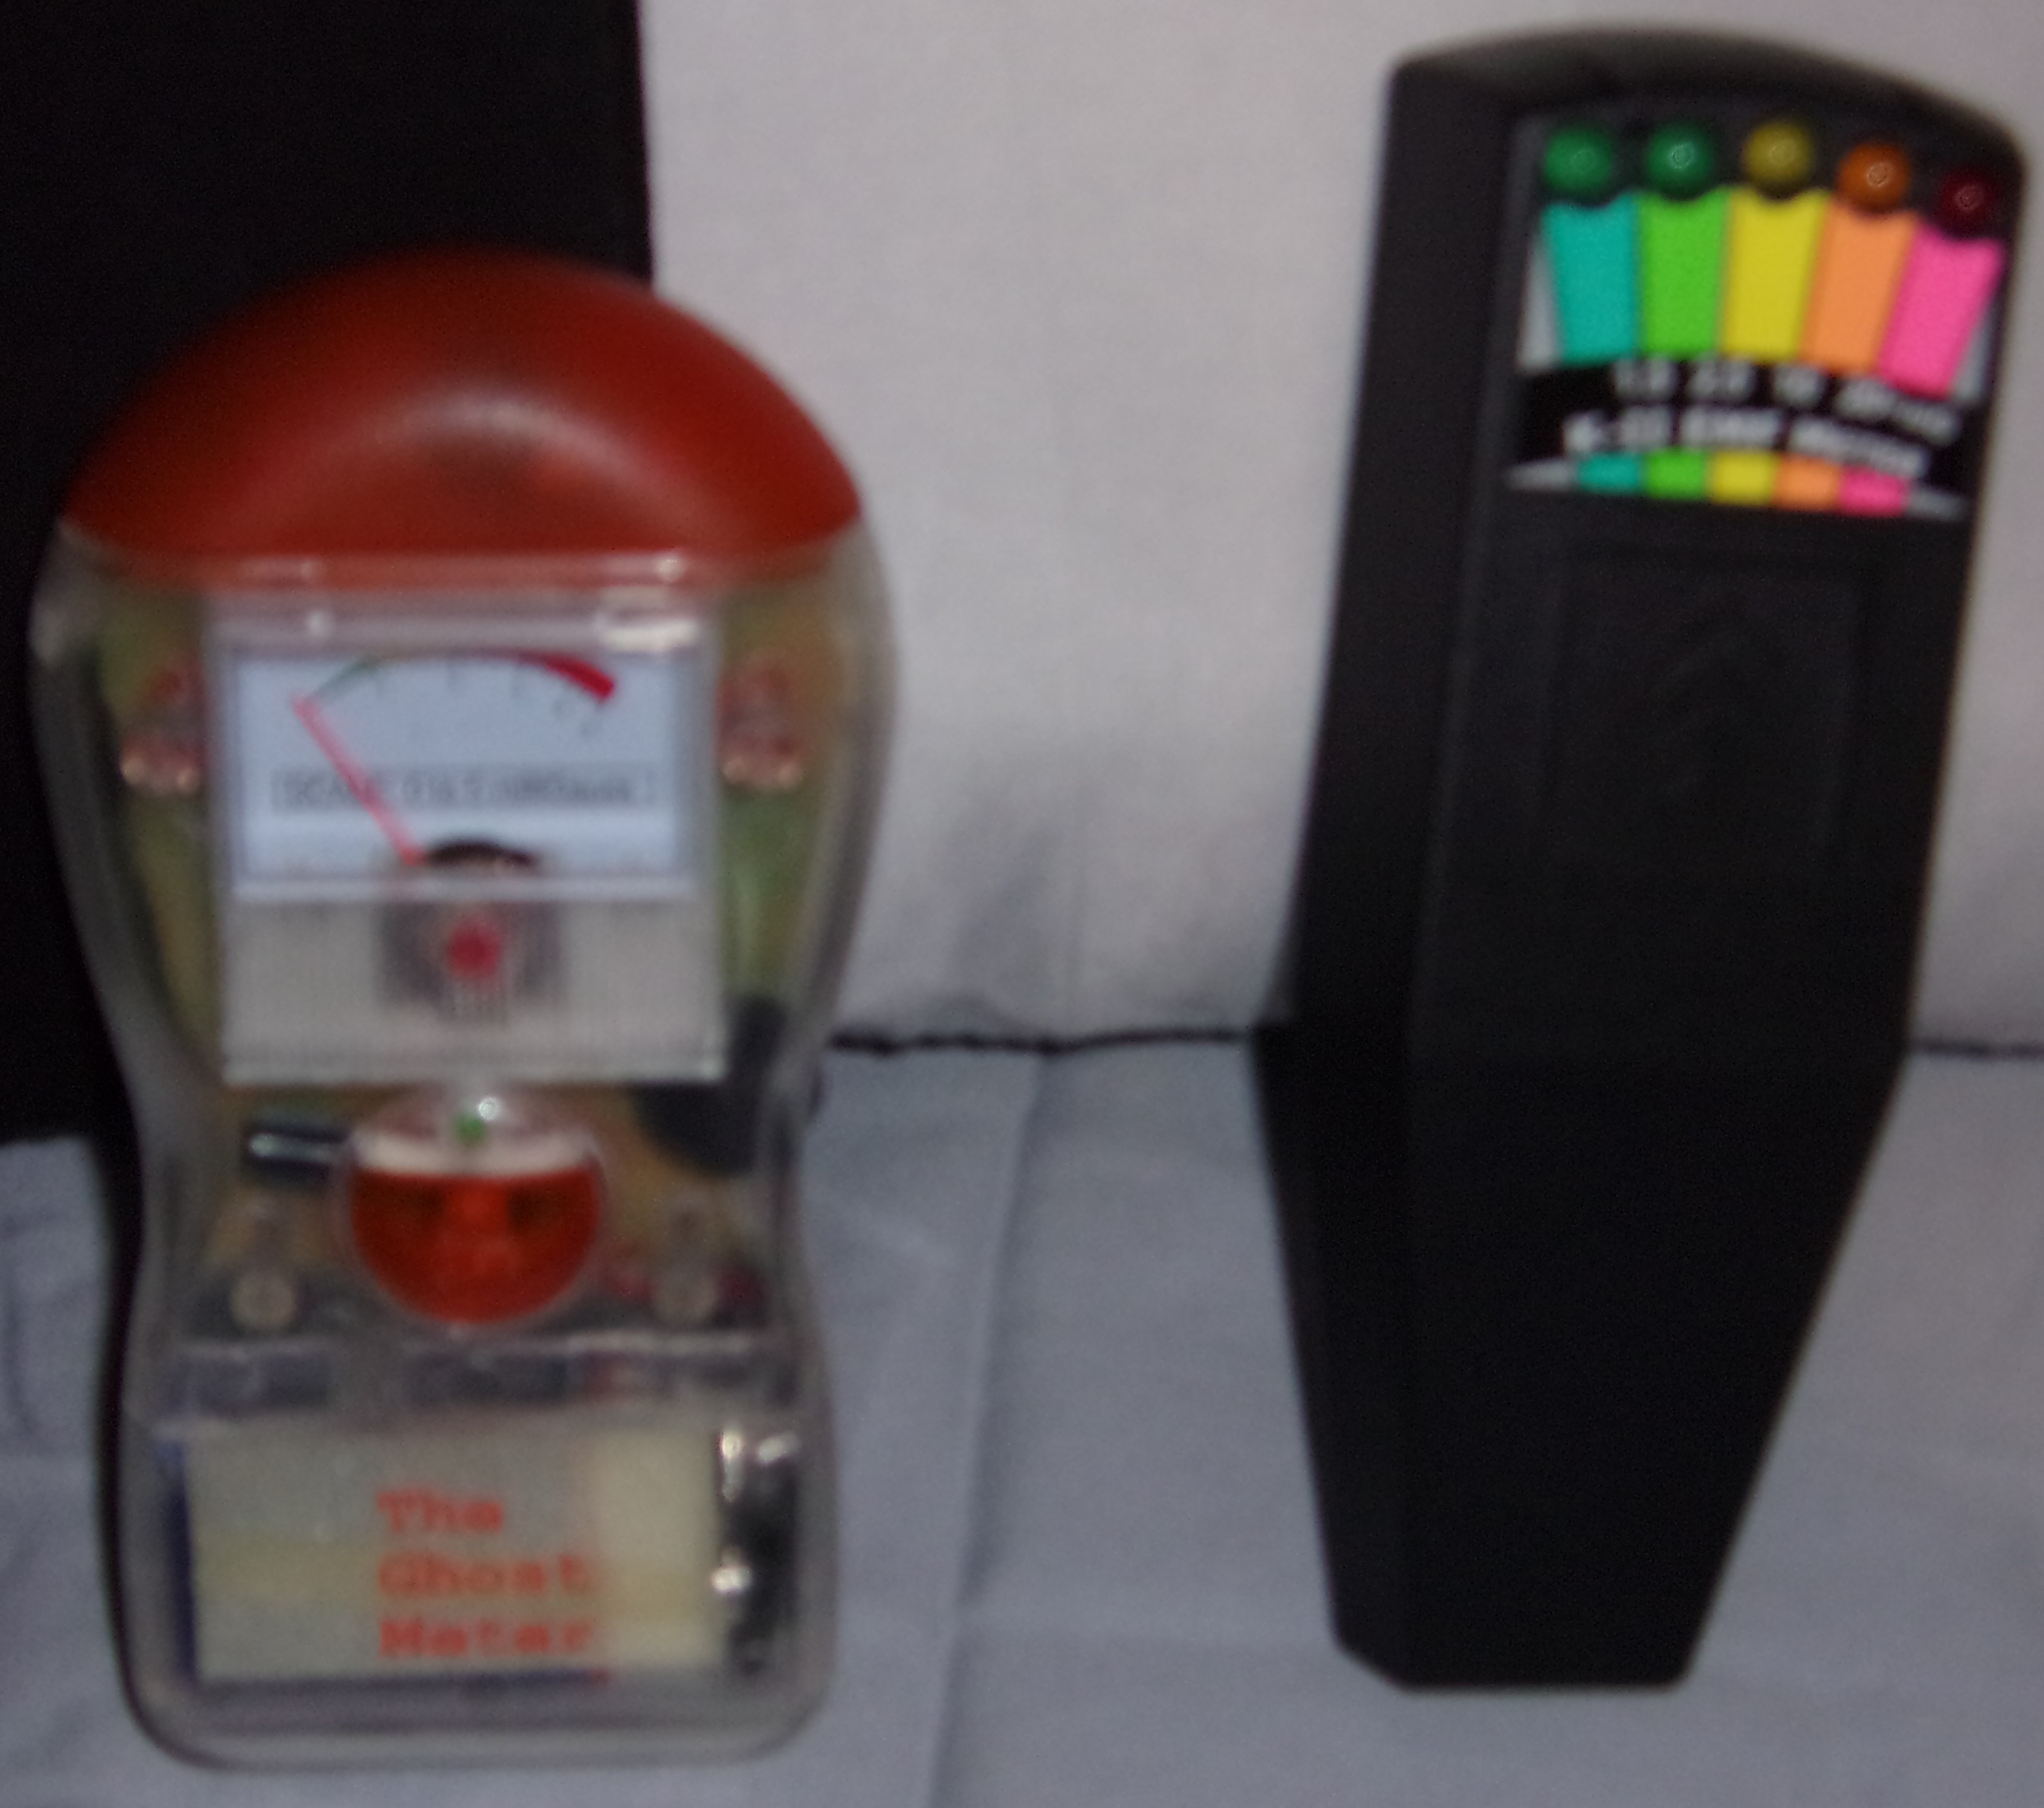
Milligauss Meters
Theory behind the use of this equipment:
Uses the theory of EMF.Characteristics:
When a spirit manifests it may give off an EMF. These meters can detect EMFs.
"Unremarkable"How to use:
1. Push the central button to turn the device on/off. When on, a green light illuminates and remains constant until turned off. Device will "warm-up" with a meter spike, beeping (K2 stays silent), and flashing red lights.
2. Get baseline readings and investigate the site. Important thing to mention is that the meter on the left will not flash or beep unless the needle reading is in the "Red Zone", indicating a spike. The k2 stays silent.
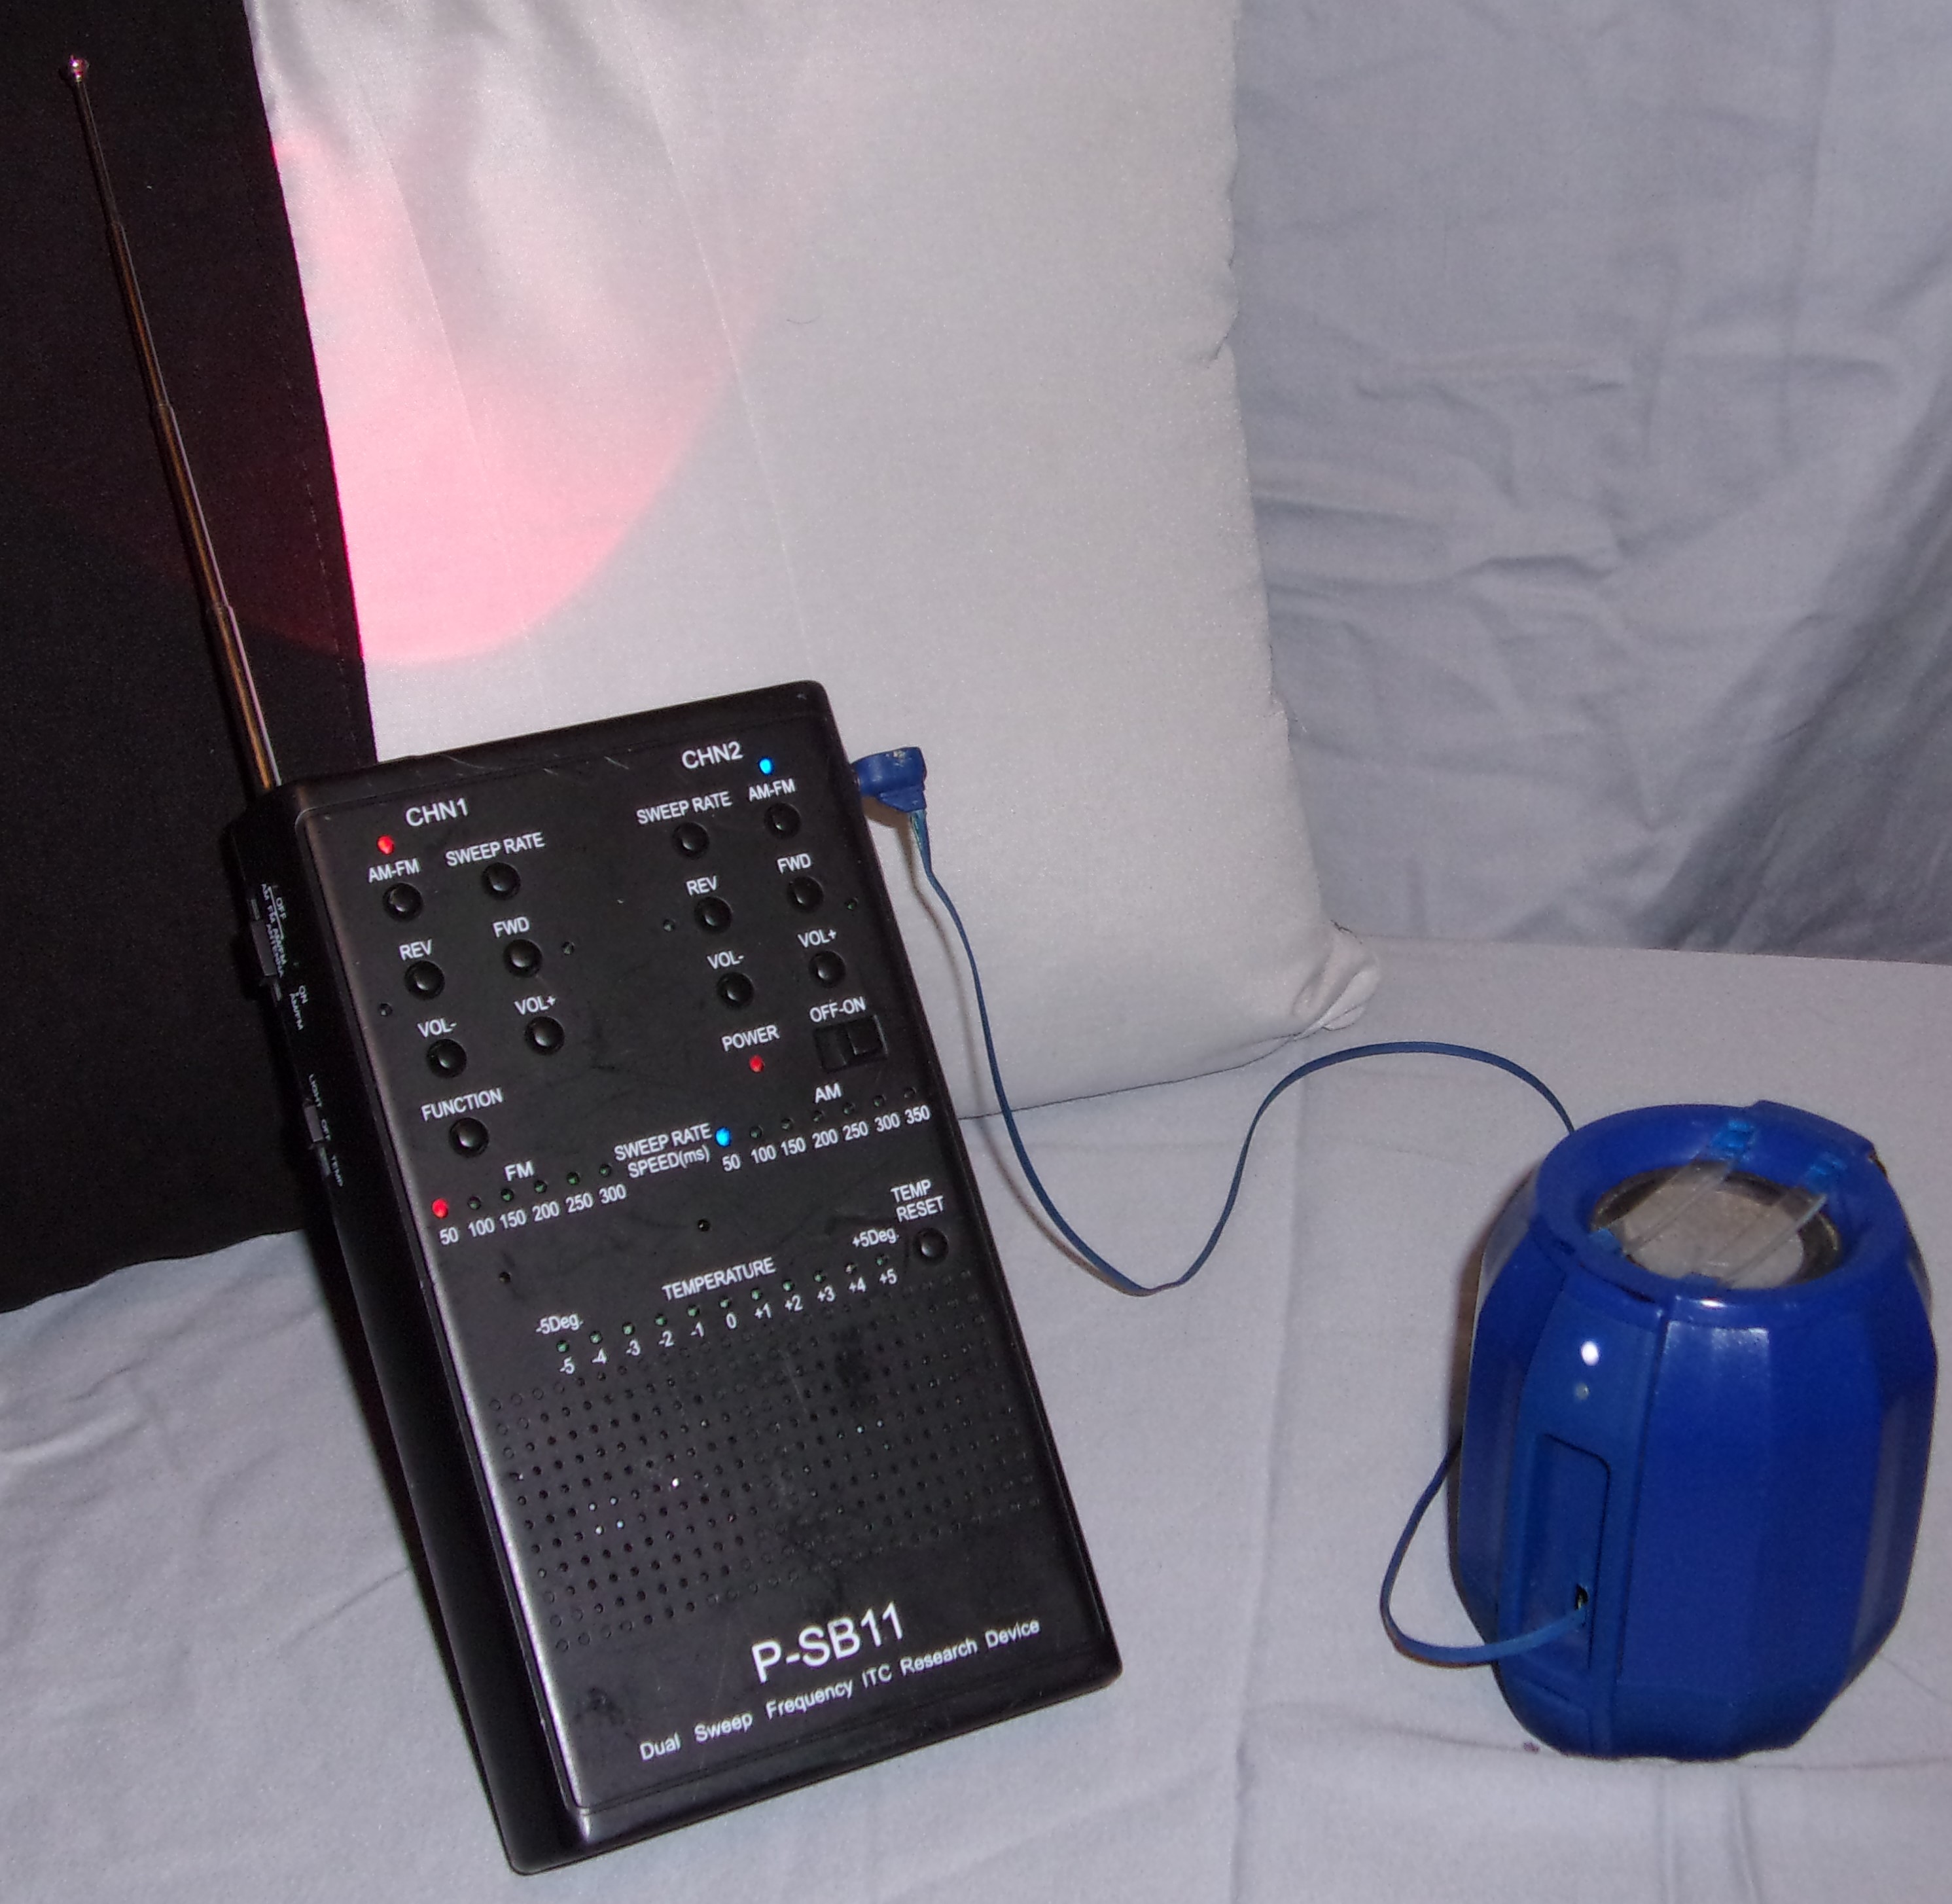
P-SB11 Static Sweeper and Speaker
Theory behind the use of this equipment:
Uses the Radio Frequency theory.Characteristics:
An RF is an electromagnetic wave frequency that usually ranges from 9kHz to 300GHz, but not limited to.
The RF theory states that if a spirit wants to communicate with you, it will try and do so by using radio frequencies that are available.
Picks up either AM/FM frequencies, has forward and reverse sweep directions, and adjustable sweep speed rates. Can also turn off frequency pickup for pure static white noise. Included on this device is a red flashlight and ATDD (Ambient Temperature Deviation Detection) feature.How to use:
Can be used with/without the external speaker. The AUX cord is attached to one of two channel options on the right side.
1. Extend the telescopic antenna on the top left of the device.
2. On the front of the P-SB11 device underneath VOL+ in the CHN2 column is the on/off switch.
This is a dual channel sweeper, meaning that it will run two different sweeps in any combination of AM/FM, forward/revers, and varying speeds.3. Hit the FUNCTION button once to turn off CHN2, leaving CHN1 on to run a single sweep.
4. Hit FUNCTION again to switch from CHN1 to CHN2.
5. Hit FUNCTION a third time to set both channels on.
The AM-FM button switches between the frequencies.6. To begin sweeping, hold either REV or FWD under the operational channel(s).
Red = FM
Blue = AM
7. Speed of the sweeps is adjusted using the SWEEP RATE button, starting at the fastest (50ms) to slowest (300ms).
8. Volume can be adjusted independently of each channel.
9. On the left side of the device are two switches. The top switch has 4 positions.
On the top switch, first position turns off the AM pickup, the second turns of FM, the third turns off pickup for both, and the fourth turns on pickup for both signalled by a green light.NOTE: The P-SB11 Static Sweeper is still undergoing field testing to determine its value and practicality during investigations.
The second switch is LIGHT OFF TEMP.
Set to LIGHT, the device will emit a red light from the top of the device. OFF is niether option. TEMP turns on ATDD.10. To mute the device for any reason, the MUTE button is on the right side next to the AUX jacks.
In this mode a green light under TEMPERATURE will show on 0, meaning there is no change in temperature at this time. If it detects a change either +/- the device will emit a sound and the light will shift either left or right.
11. To discontinue use and turn off the device at any time, just switch the OFF-ON switch to off.
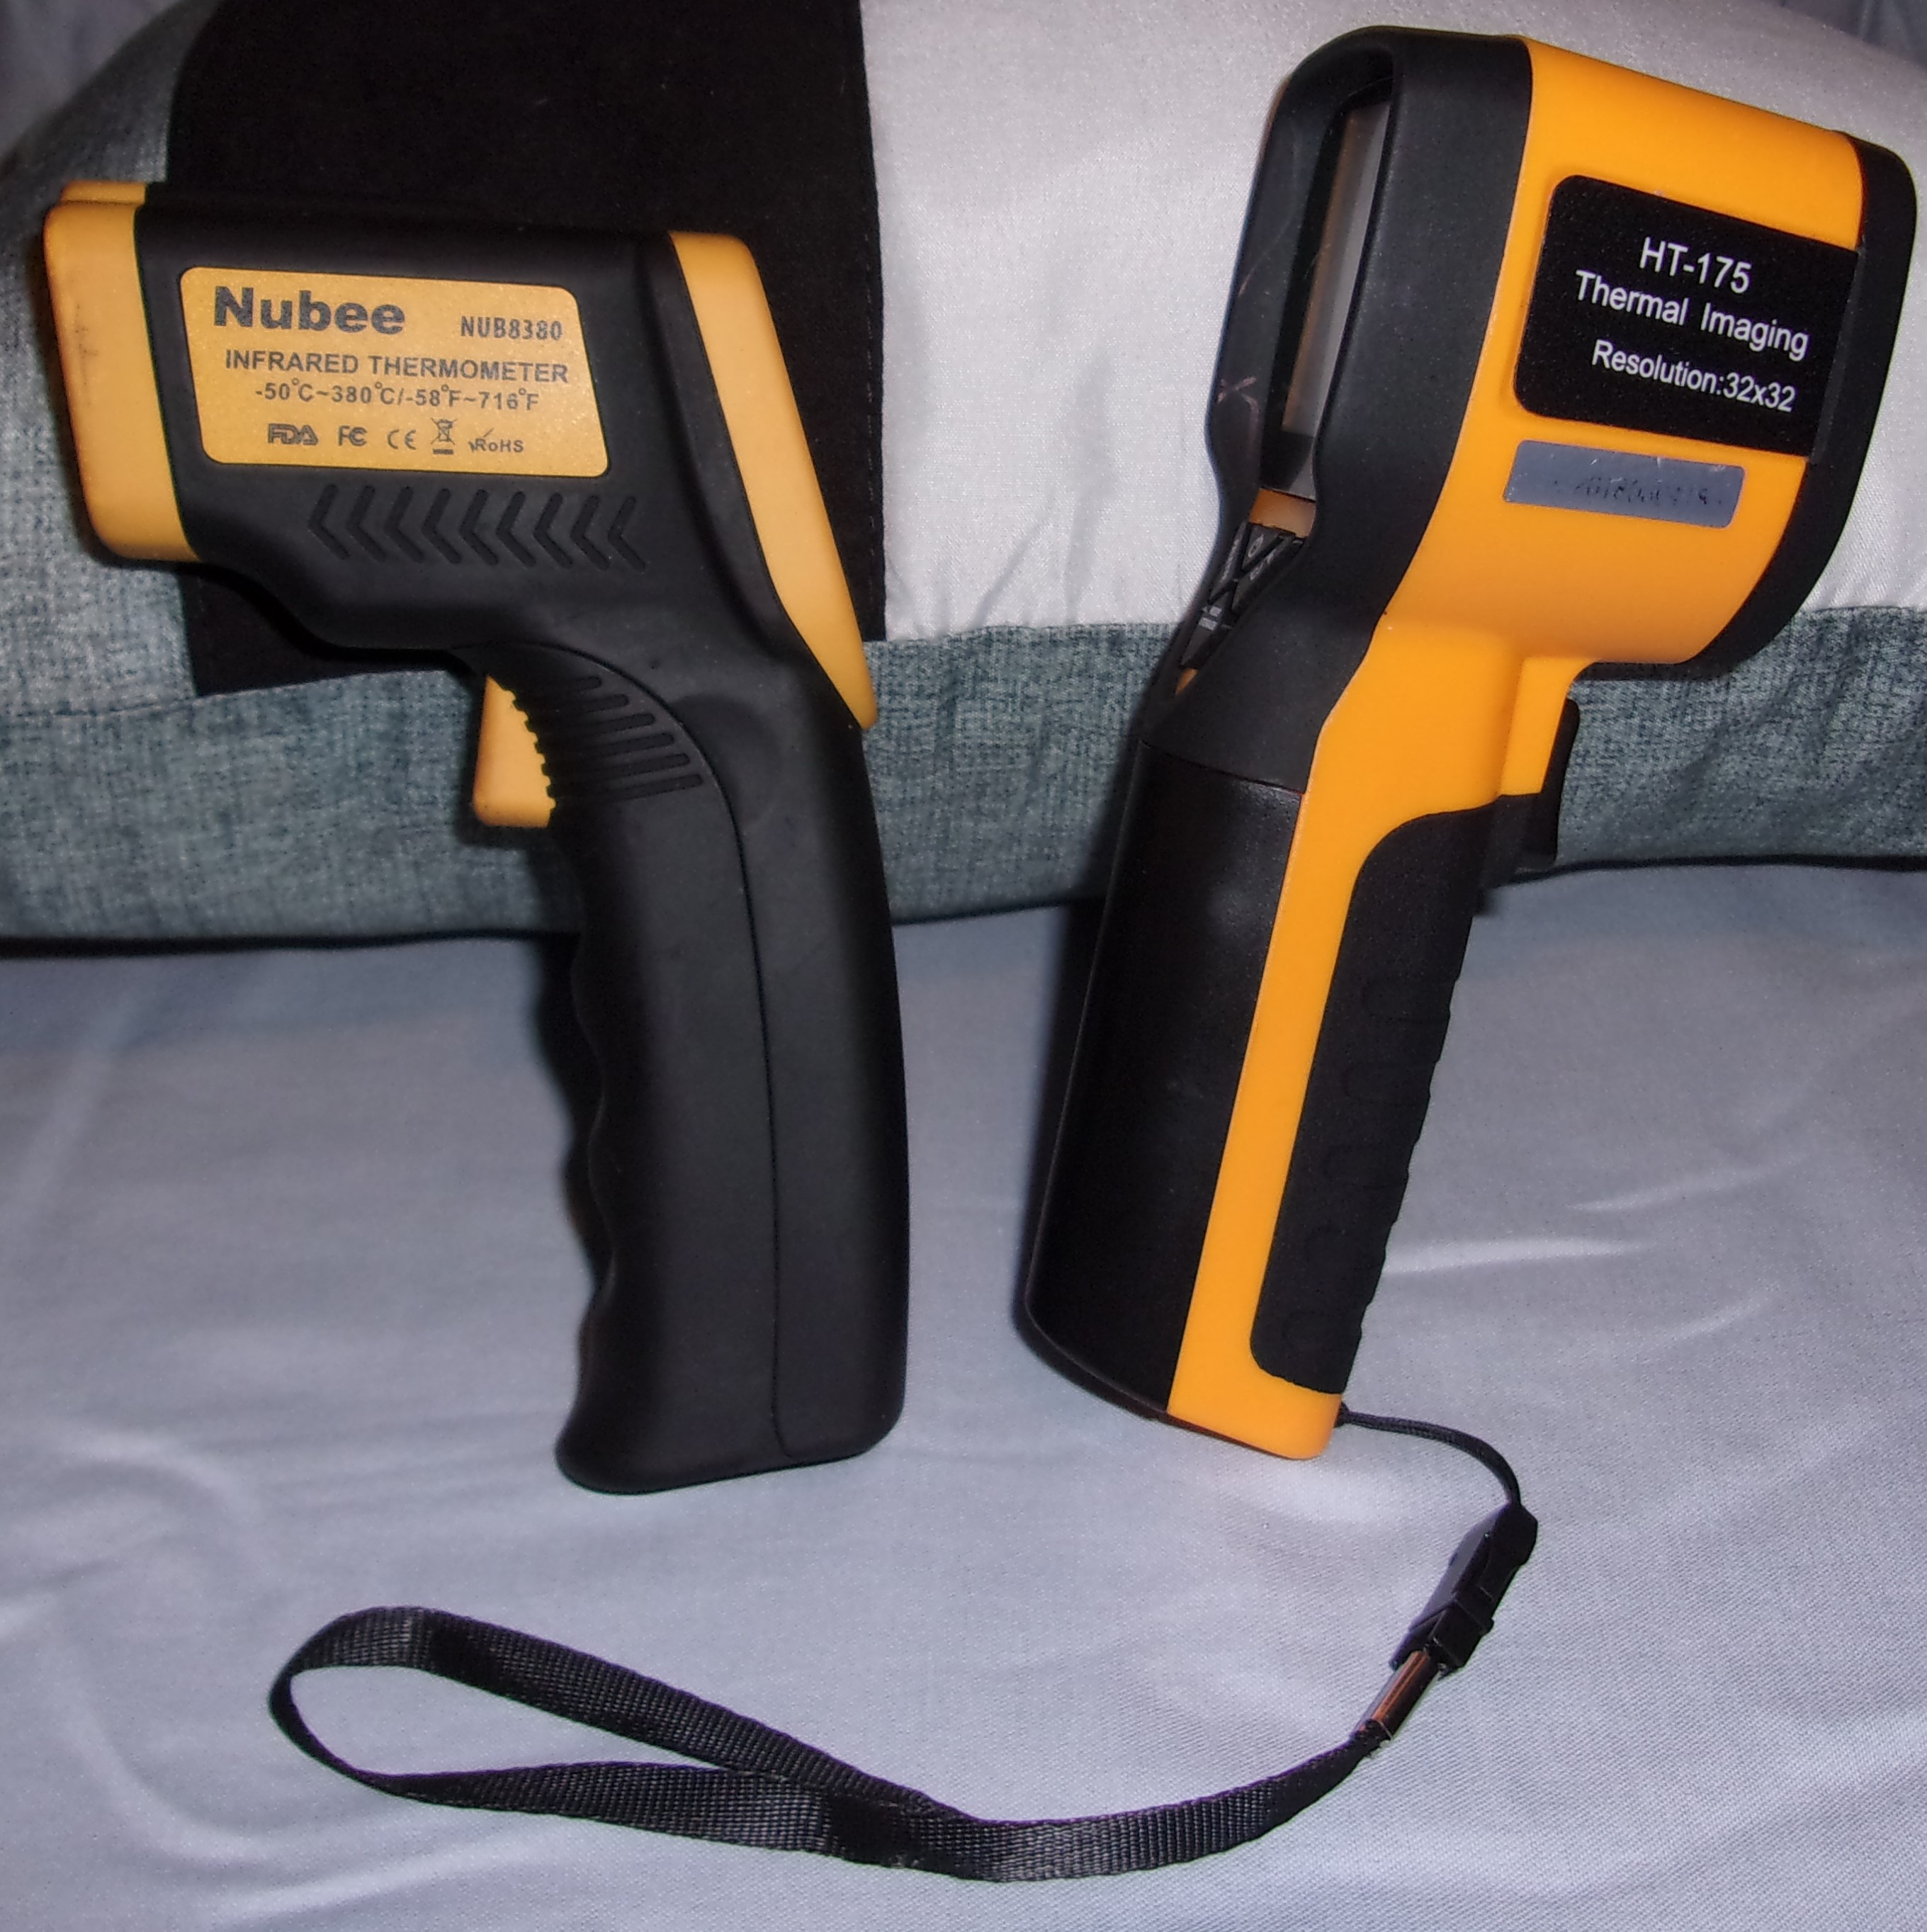
Theory behind the use of this equipment:
IR Thermometer and Short-Range Thermal Imager Uses the Temperature Theory.Characteristics:
In theory, when a spirit starts to manifest, it will draw in heat energy around the area, causing either a cold or hot spot.Both devices are pretty similar in how to use and how they look. The displays are the only major difference between the two.How to use:
IR Thermometer:1. Point and hold the trigger in desired location during investigation.Short-Range Thermal Imager
A red laser pointer dot will appear where the device is pointed, and the screen will glow blue and display the given temperature.
C/F button changes the displayed temperature from F to C.
Center button turns the laser pointer on/off.
Light-bulb button turns the blue lit display on/off.1. Hold the top center button underneath the display to turn device on/off. It takes a moment to boot-up.NOTE: Neither device actually records their readings. Video proof is recommended, but written is acceptable. Think about written vs video recorded credibility to the average person.
2. Point device in desired direction of investigation.
Top left of the display shows battery life.3. Click the trigger to freeze the display to get recorded and witnessed by another team member.
Top right of the display shows dynamic temperature reading.
Bottom left of the display shows the min. temp. of what is currently on screen.
Bottom right of display shows the max temp. of what is currently on screen.
PALETTE button swaps the color pallette of the display between color and IR.
C/F button changes displayed temp. readings between Fahrenheit and Celsius.
Mode Storage button does not seem to have any function at this time.
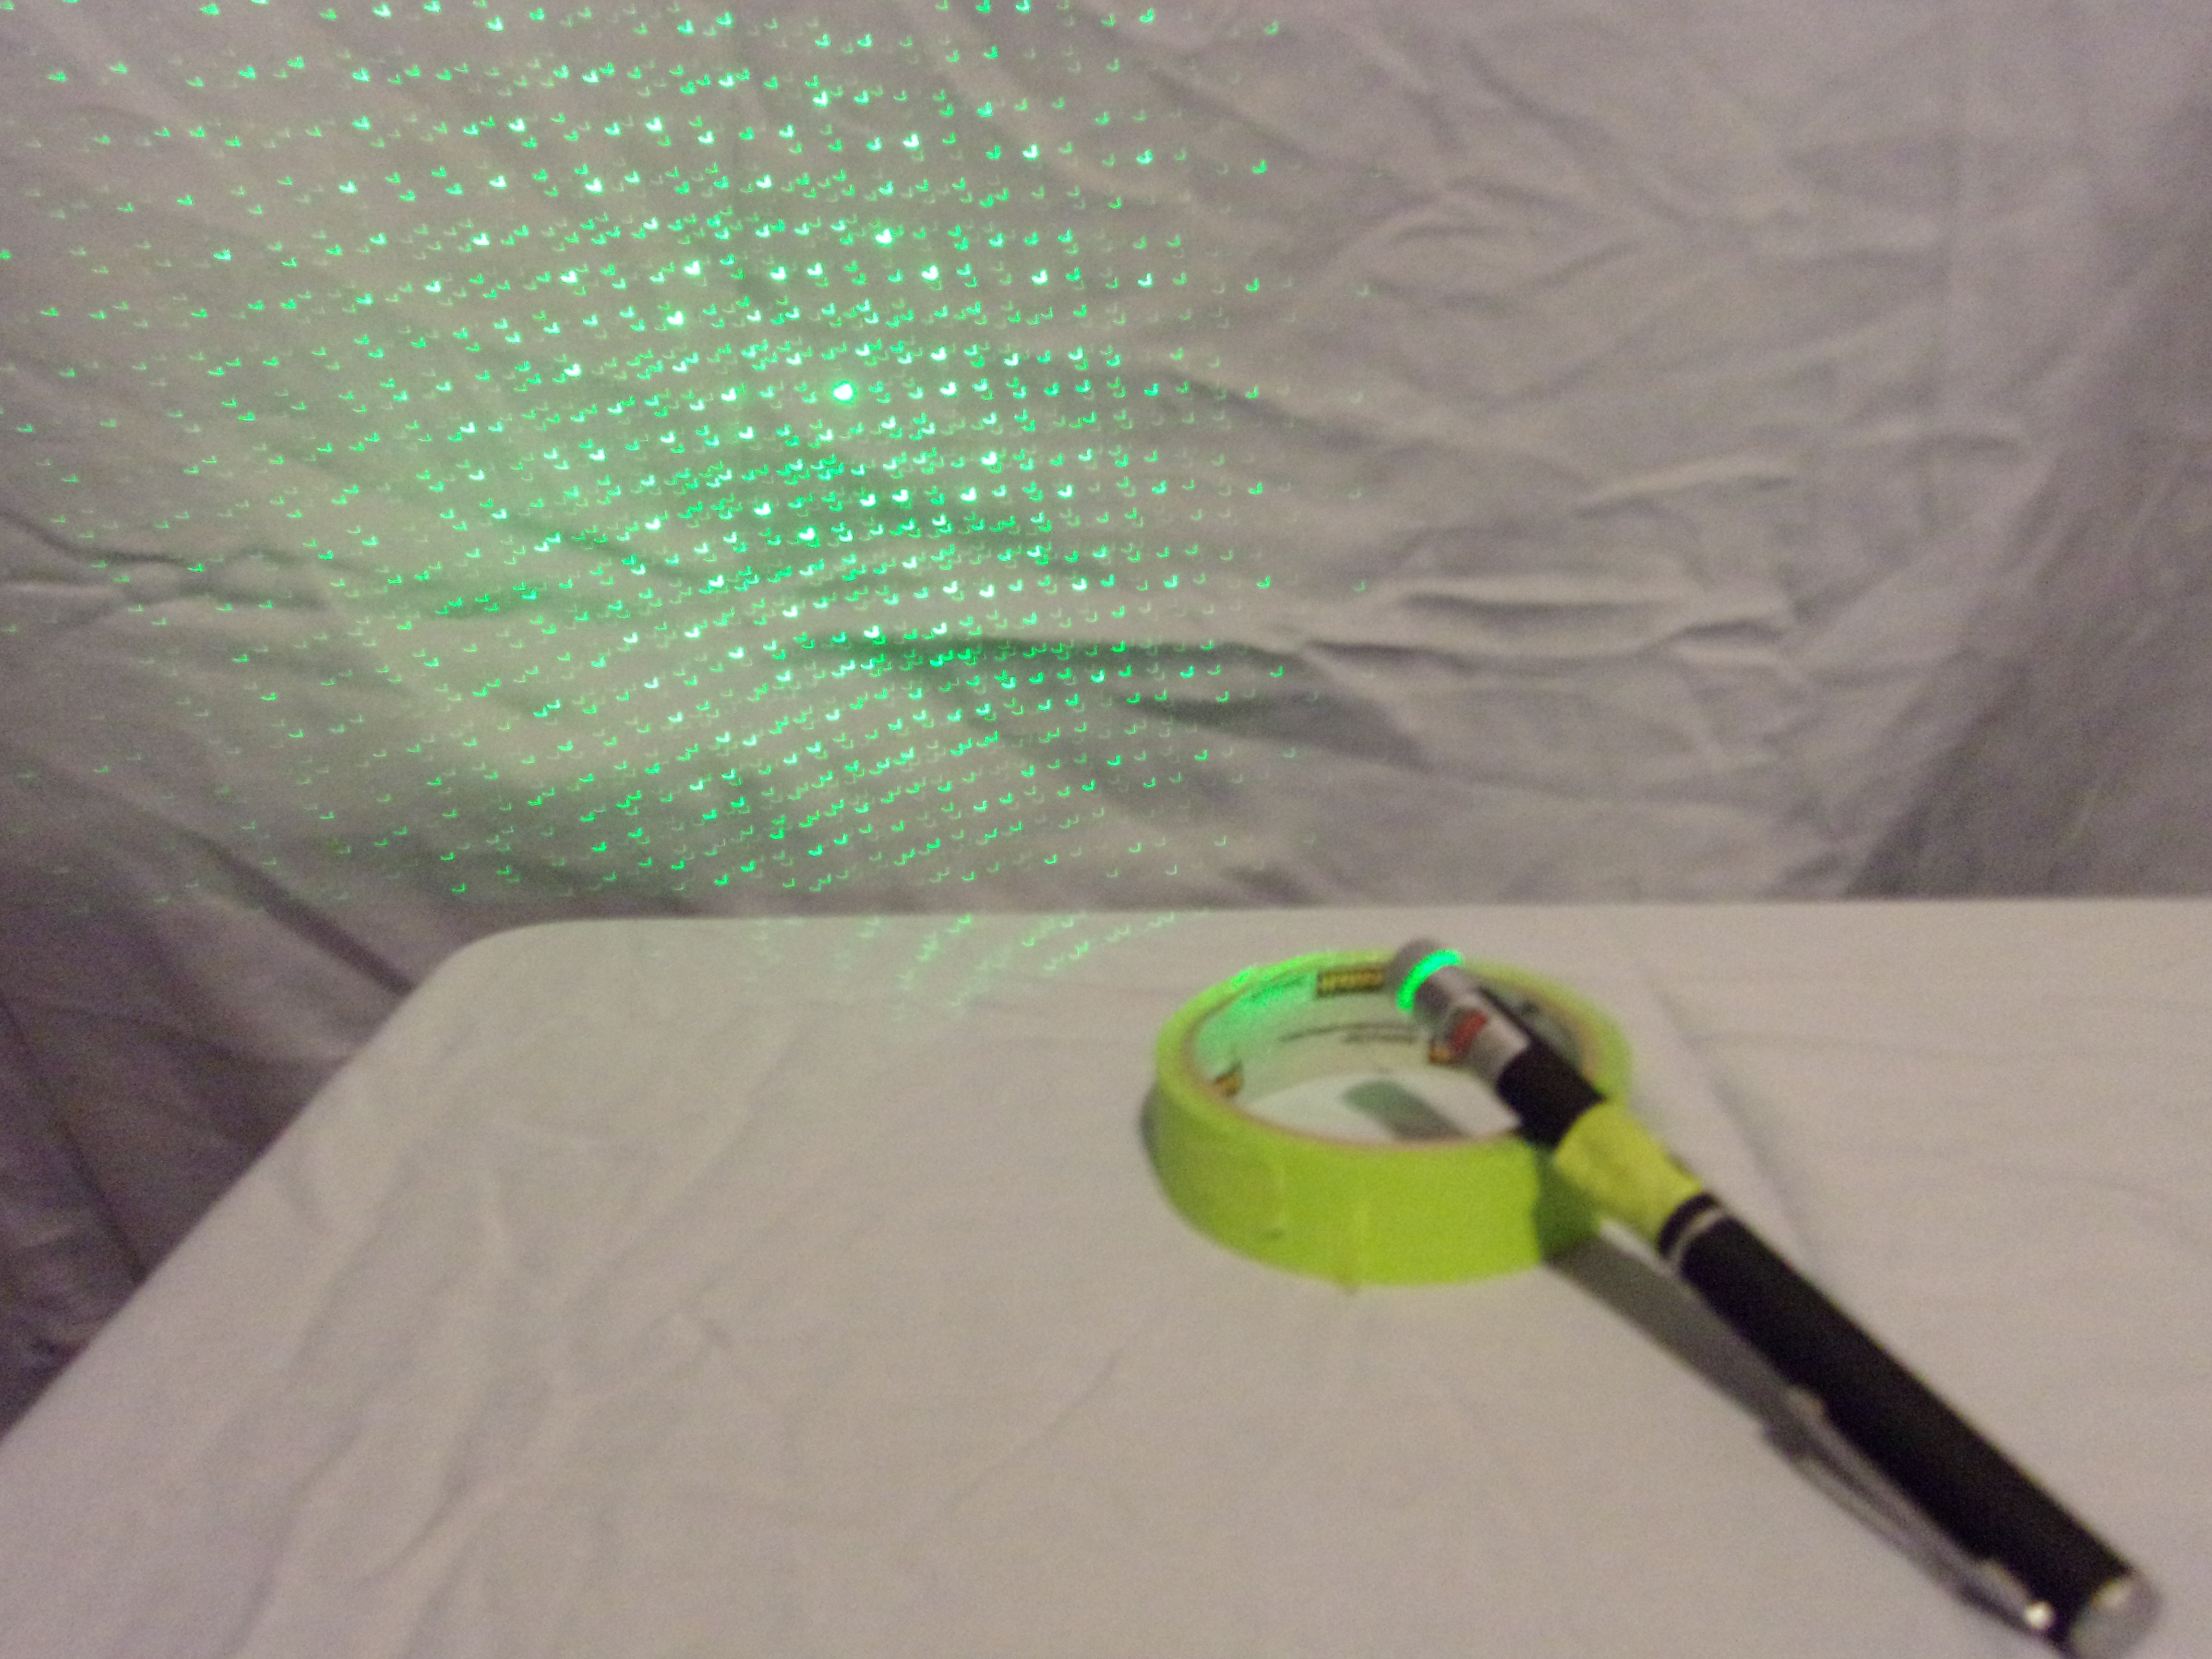
Theory behind the use of this equipment:
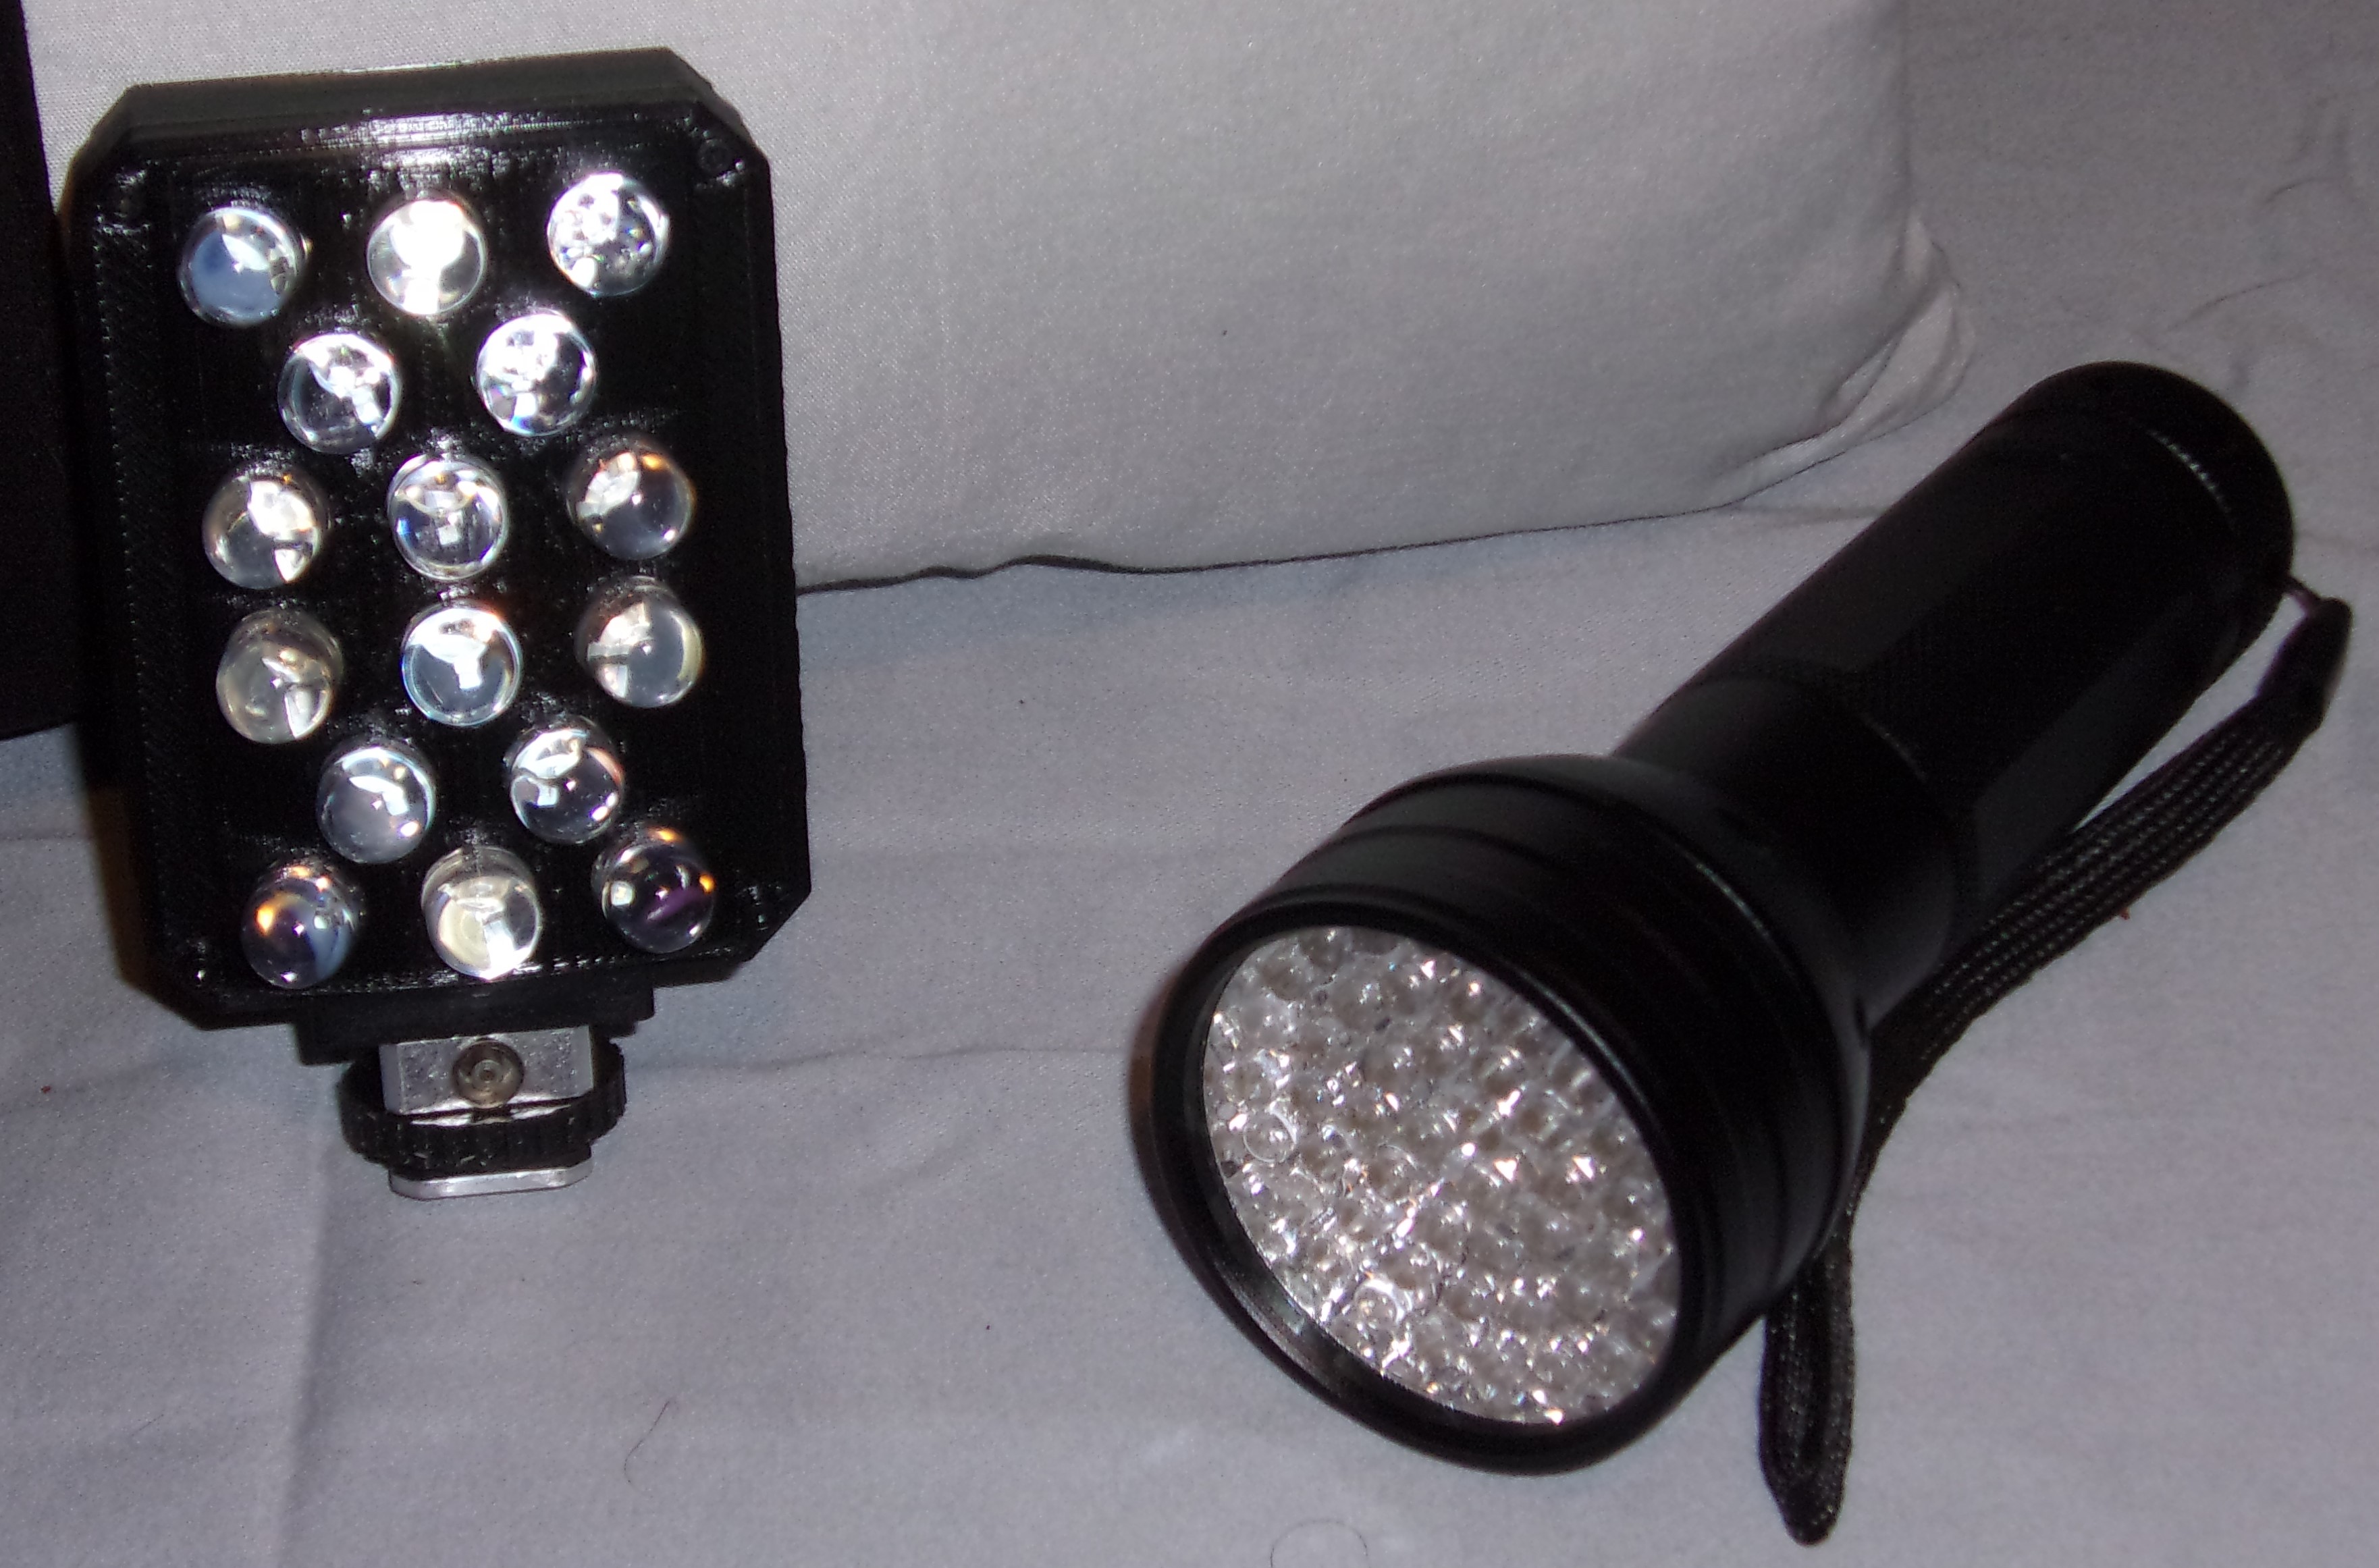
Laser Grid Penlights When the laser dots are projected into an area, and an entity crosses the dots, it will cause a break in the projection.Characteristics:
By using dot projection, it may be possible to determine the size and shape of the entity as it passes through the projection field.Do not stare directly into the beam of the projected laser. One is rechargeable, the other is not.How to use:1. Point the silver-tipped end at the desired location, hold the silver button to project the green laser grid, and observe.NOTE: One can also use the laser holder attachment for the tripod so they do not have to carry around the laser grid penlight
Releasing the button will turn off the grid
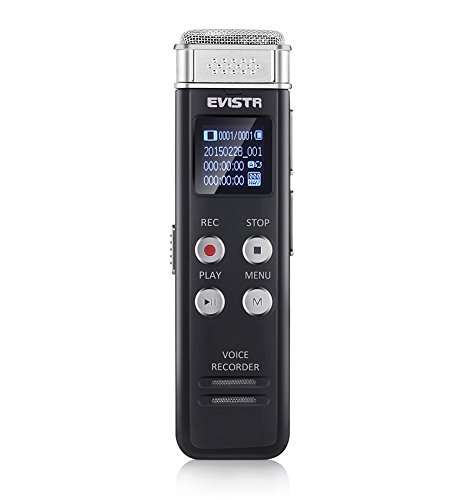
Theory behind the use of this equipment:
Digital Audio Recorders In theory a spirit may communicate with you through electronic voice phenomenon (EVP). EVP is picked up through an audio recording device. You cannot hear EVPs while they are happening. When you play the audio recording back, you will be able to hear them.Characteristics:"Unremarkable"
How to use:1. Move the left side on/off switch to on.
Display lights up and shows main screen2. Push REC button to start a recording session.
3. State who you are, the location, and who is currently in the group at the site, and begin.
Make note of any possible contamination, like animals and other people whispering/talking during the session.4. Before pressing STOP, state that you are ending the session, then press STOP. The display should show "Saved!" shortly after.
5. To review recording on the spot, press PLAY.
Adjust the volume with the button on the right side. Headphones are optional, AUX jack on the left side.6. To fast forward/rewind, hold the skip button in desired direction.
7. To skip/choose specific recordings, tap the skip button in the desired direction.
8. MENU button would take pages to explain all functions included in this device.
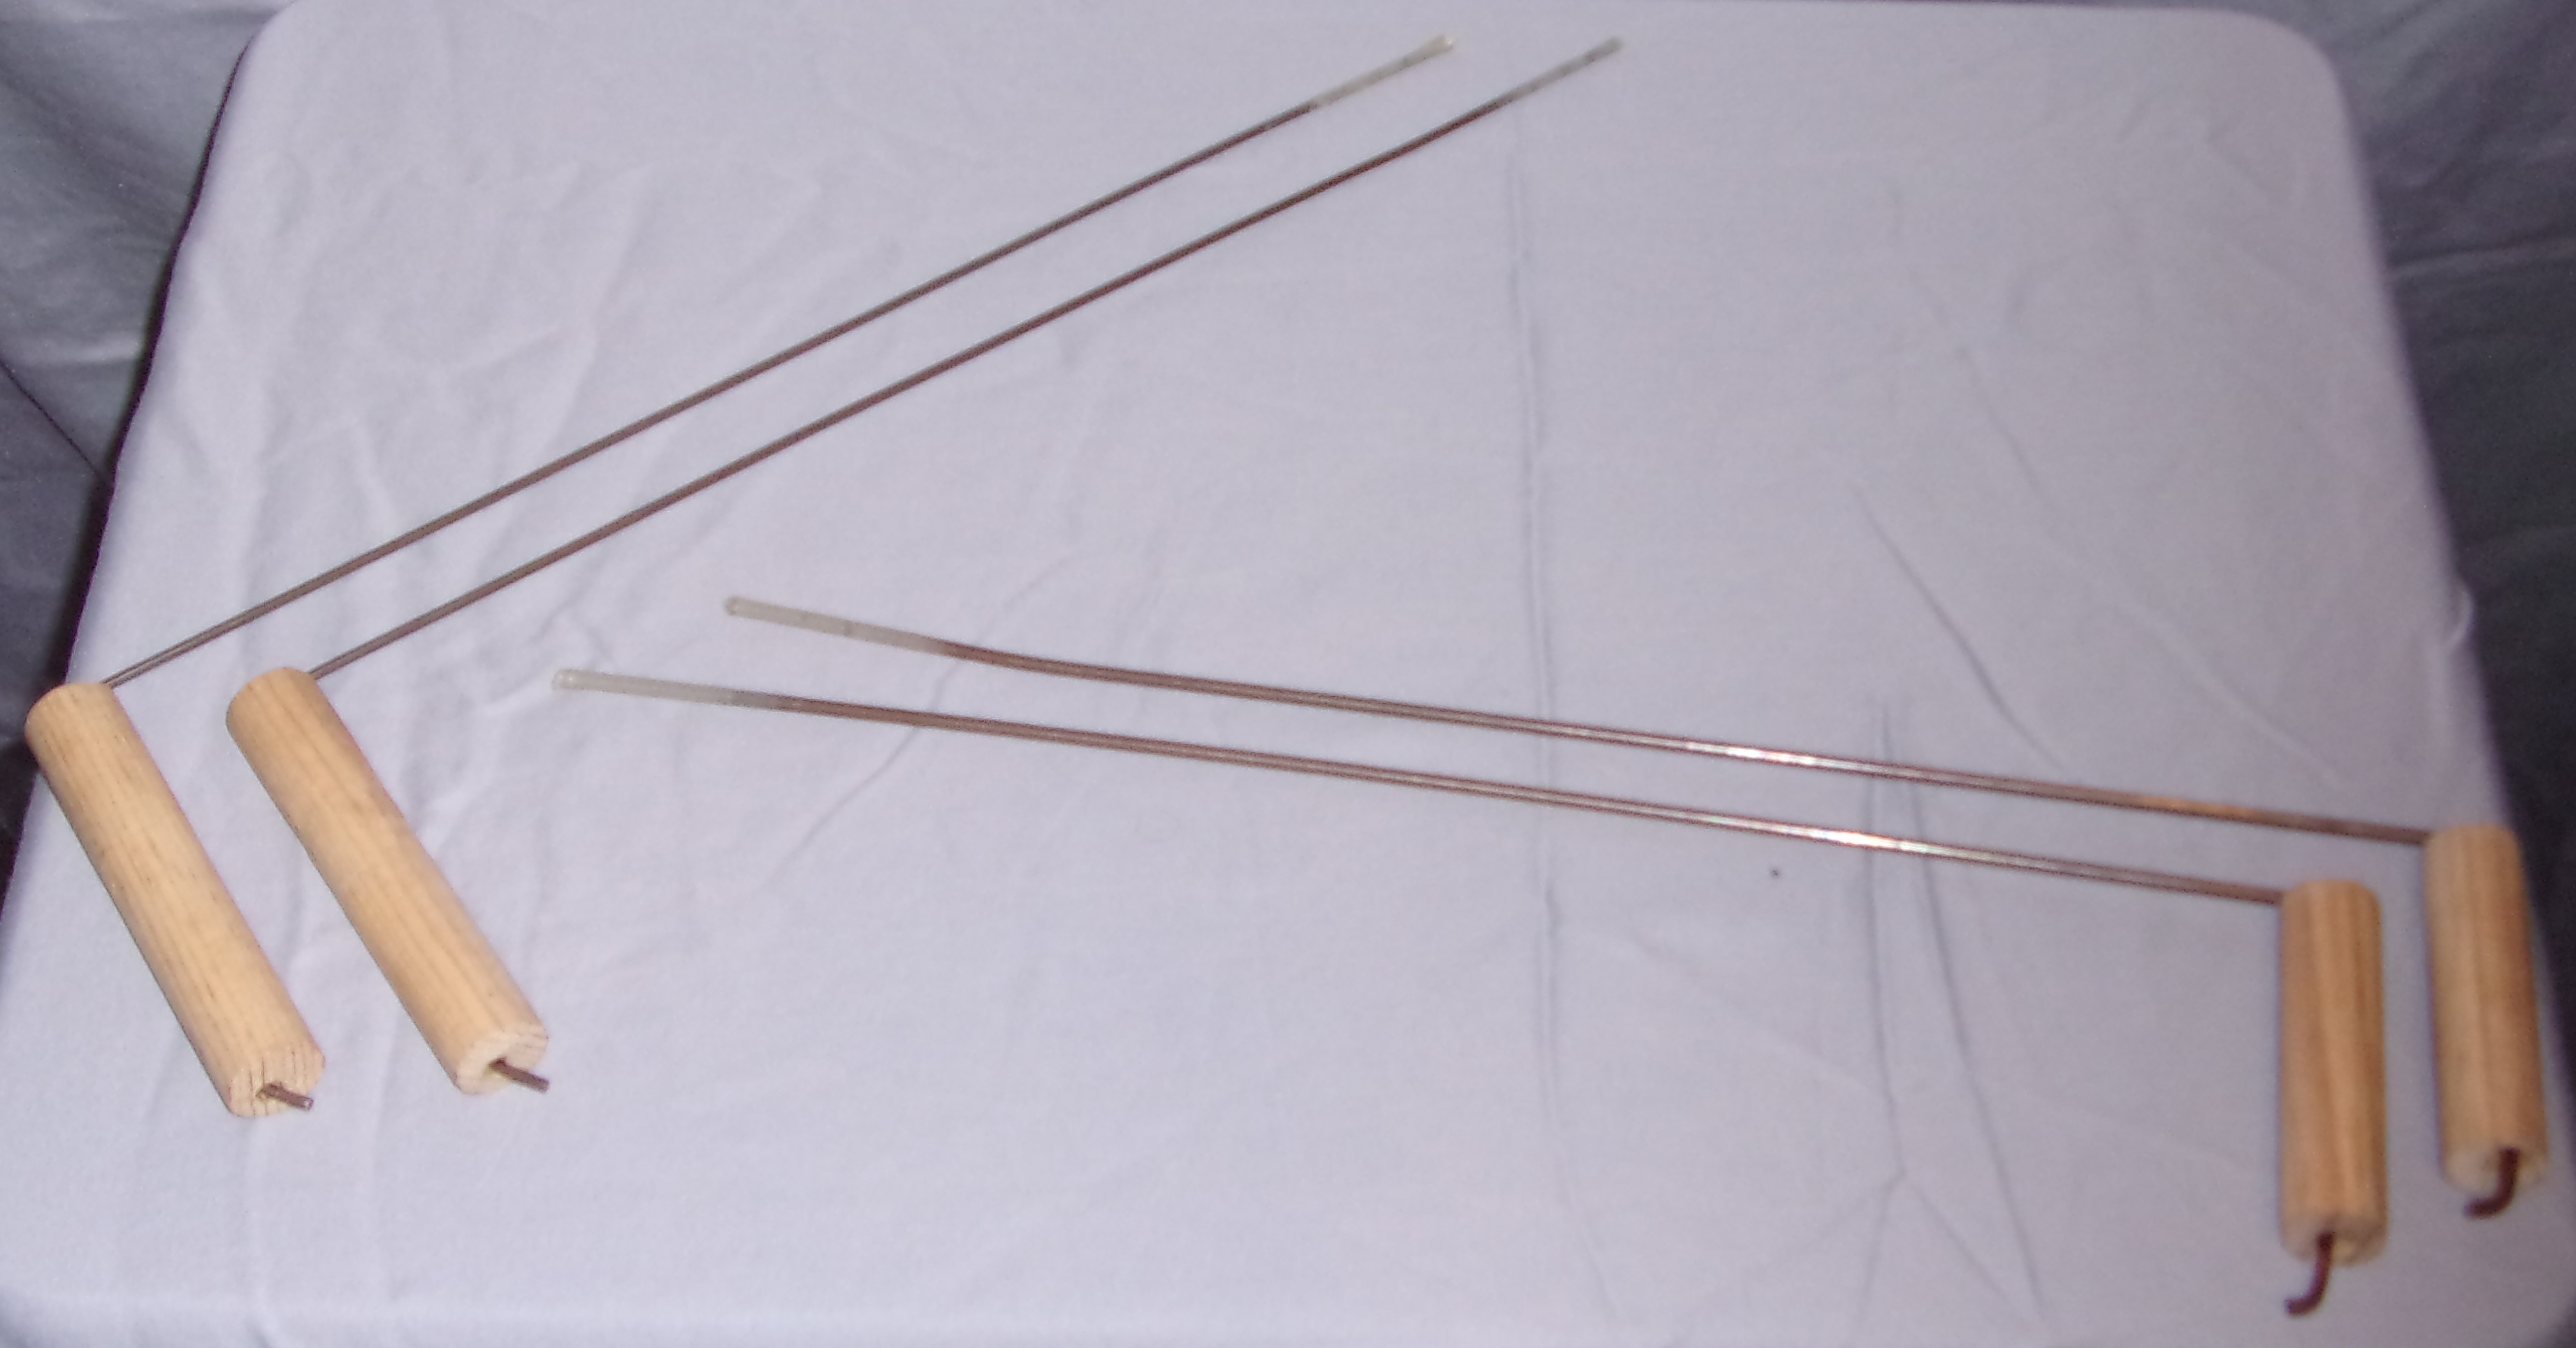
Theory behind the use of this equipment:
Dowsing Rods I suspect electromagnetism.Characteristics:
In theory, spirits give off spiritual energy. Any energy that surrounds the dowsing rods will cause them to either cross or uncross.
The ability to dowse is supposedly an innate ability held by only the chosen few, a talent much like ESP or Psi.
The subconcious is suspected to be in control of the responses the rods provide. If one believes the subconscious houses only the thoughts, history, memory, and imagination of the user, then it would seem true that the rods act from the direction of the user."Unremarkable"How to use:1. Hold the handles with the long rods parallel to the ground with your elbows at your sides for stability, thumbs lightly pressed on the top angle of the rods to prevent its own weighted movement, but loose enough for supposed forces to act on the rods.NOTE:The Dowsing Rods are still undergoing field testing to determine their value and practicality during investigations. Not to be used as actual "Evidence" of unexplained phenomenon unless substantially corroborated by other means/tools of investigation.
2. When investigating, move very slowly to minimize any "External" movements done to the Dowsing Rods.
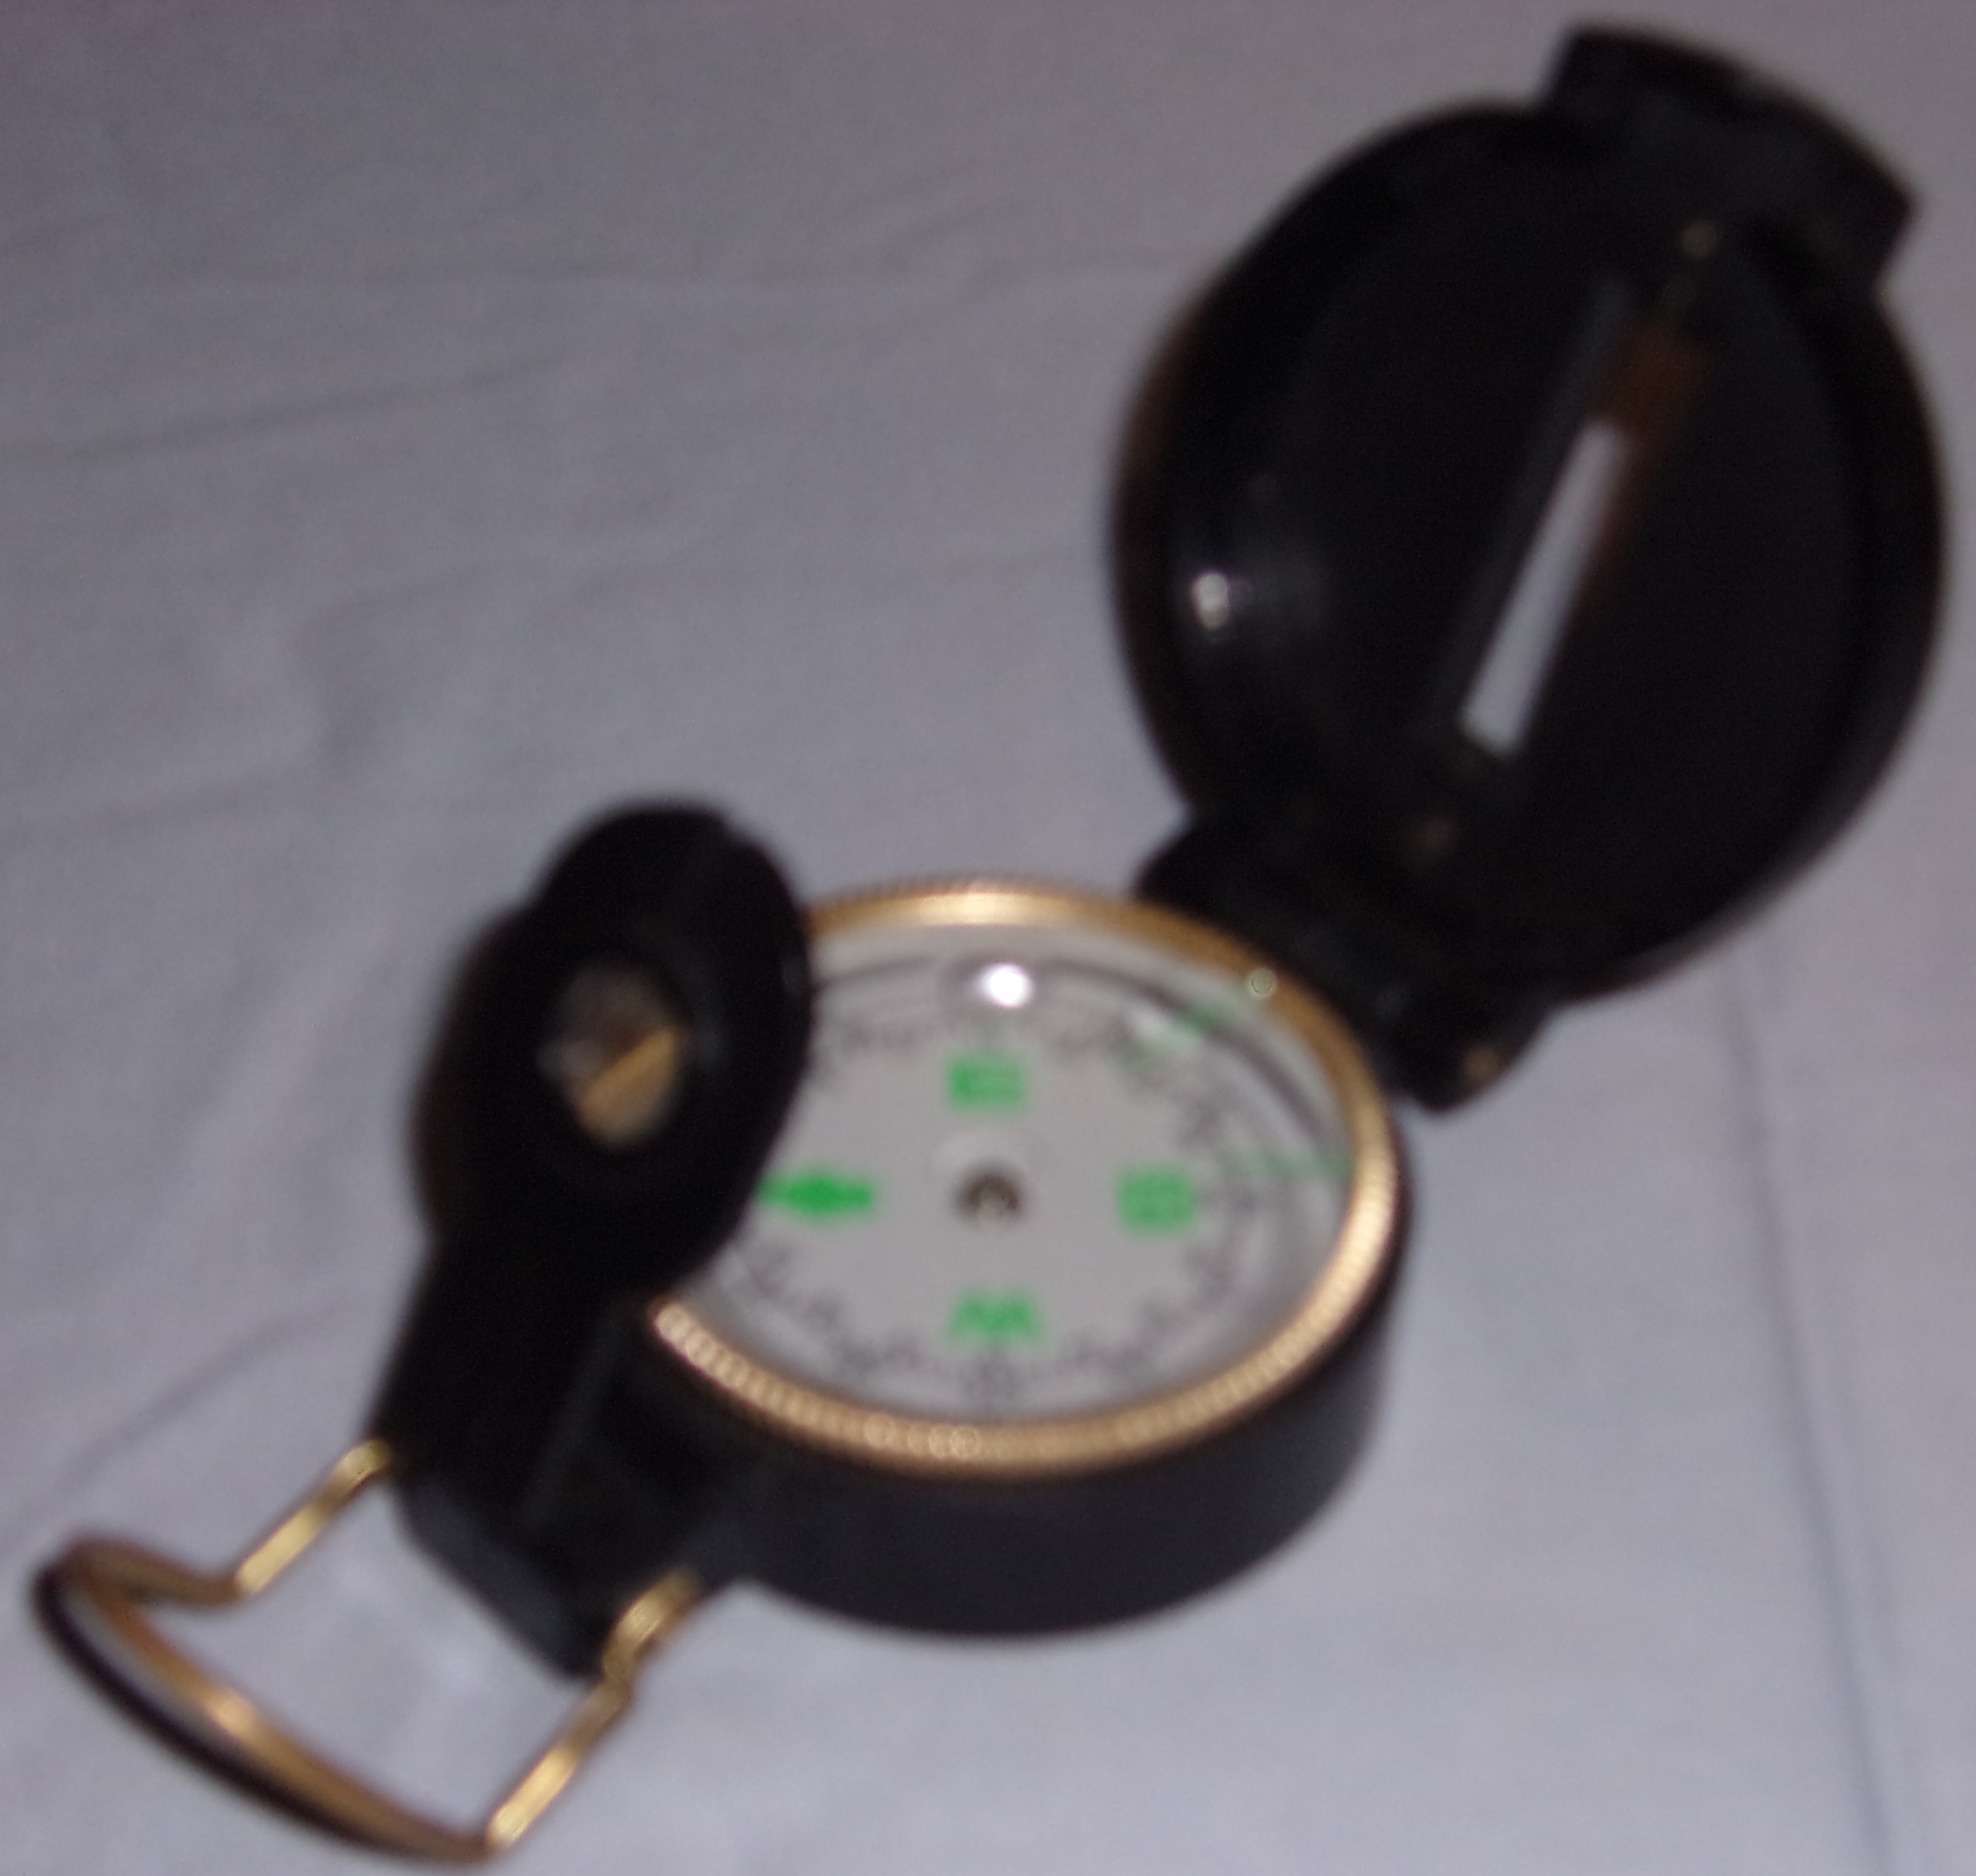
Theory behind the use of this equipment:
Compass Works on the principles of electromagnetism.Characteristics:
Will/should always point towards the north pole.
In theory, spirits will give off EMFs. This can cause the needle to spin or point in a wrong direction."Unremarkable"
How to use:1. Just open it up, set on a flat surface or carry as flat as possible with the bubble in the middle of the compass during an investigation.NOTE: The Compass is still undergoing field testing to determine its value and practicality during investigations.
Theory behind the use of this equipment:
IR Lights The light we see is known as "White Light". It is really a combination of all visible colors of the spectrum. "Visible" being the key word. The "Total Light Spectrum" is much larger than what we see.Characteristics:
It has long been theorized that entities may be more visible in other light spectrums than the normal narrow range of visible light.
The main drawback to using IR light is that it takes a really large IR illuminator to fully illuminate a big area.
IR cameras are very sensitive to small objects such as dust, pollen, bugs, etc. and are frequently seen on IR cameras and can be very easily mistaken as "Orbs"."Unremarkable"How to use:The IR handhelds work just like flashlights.
The middle device is an IR illuminator camera attachment.
1. To activate, attach one 9v battery, and to turn off just remove battery.
This particular light is very weak and rarely used.
Theory behind the use of this equipment:
UV Lights The light we see is known as "White Light". It is really a combination of all visible colors of the spectrum. "Visible" being the key word. The "Total Light Spectrum" is much larger that what we see.Characteristics:
It has long been theorized that entities may be more visible in other light spectrums than the normal narrow range of visible light."Unremarkable"How to use:The UV handheld works just like a flashlight.
The camera attachment.
1. There are two separate switches on the back side.One turns on IR, the other UV.
Can have both switches on for full-spectrum.
Theory behind the use of this equipment:
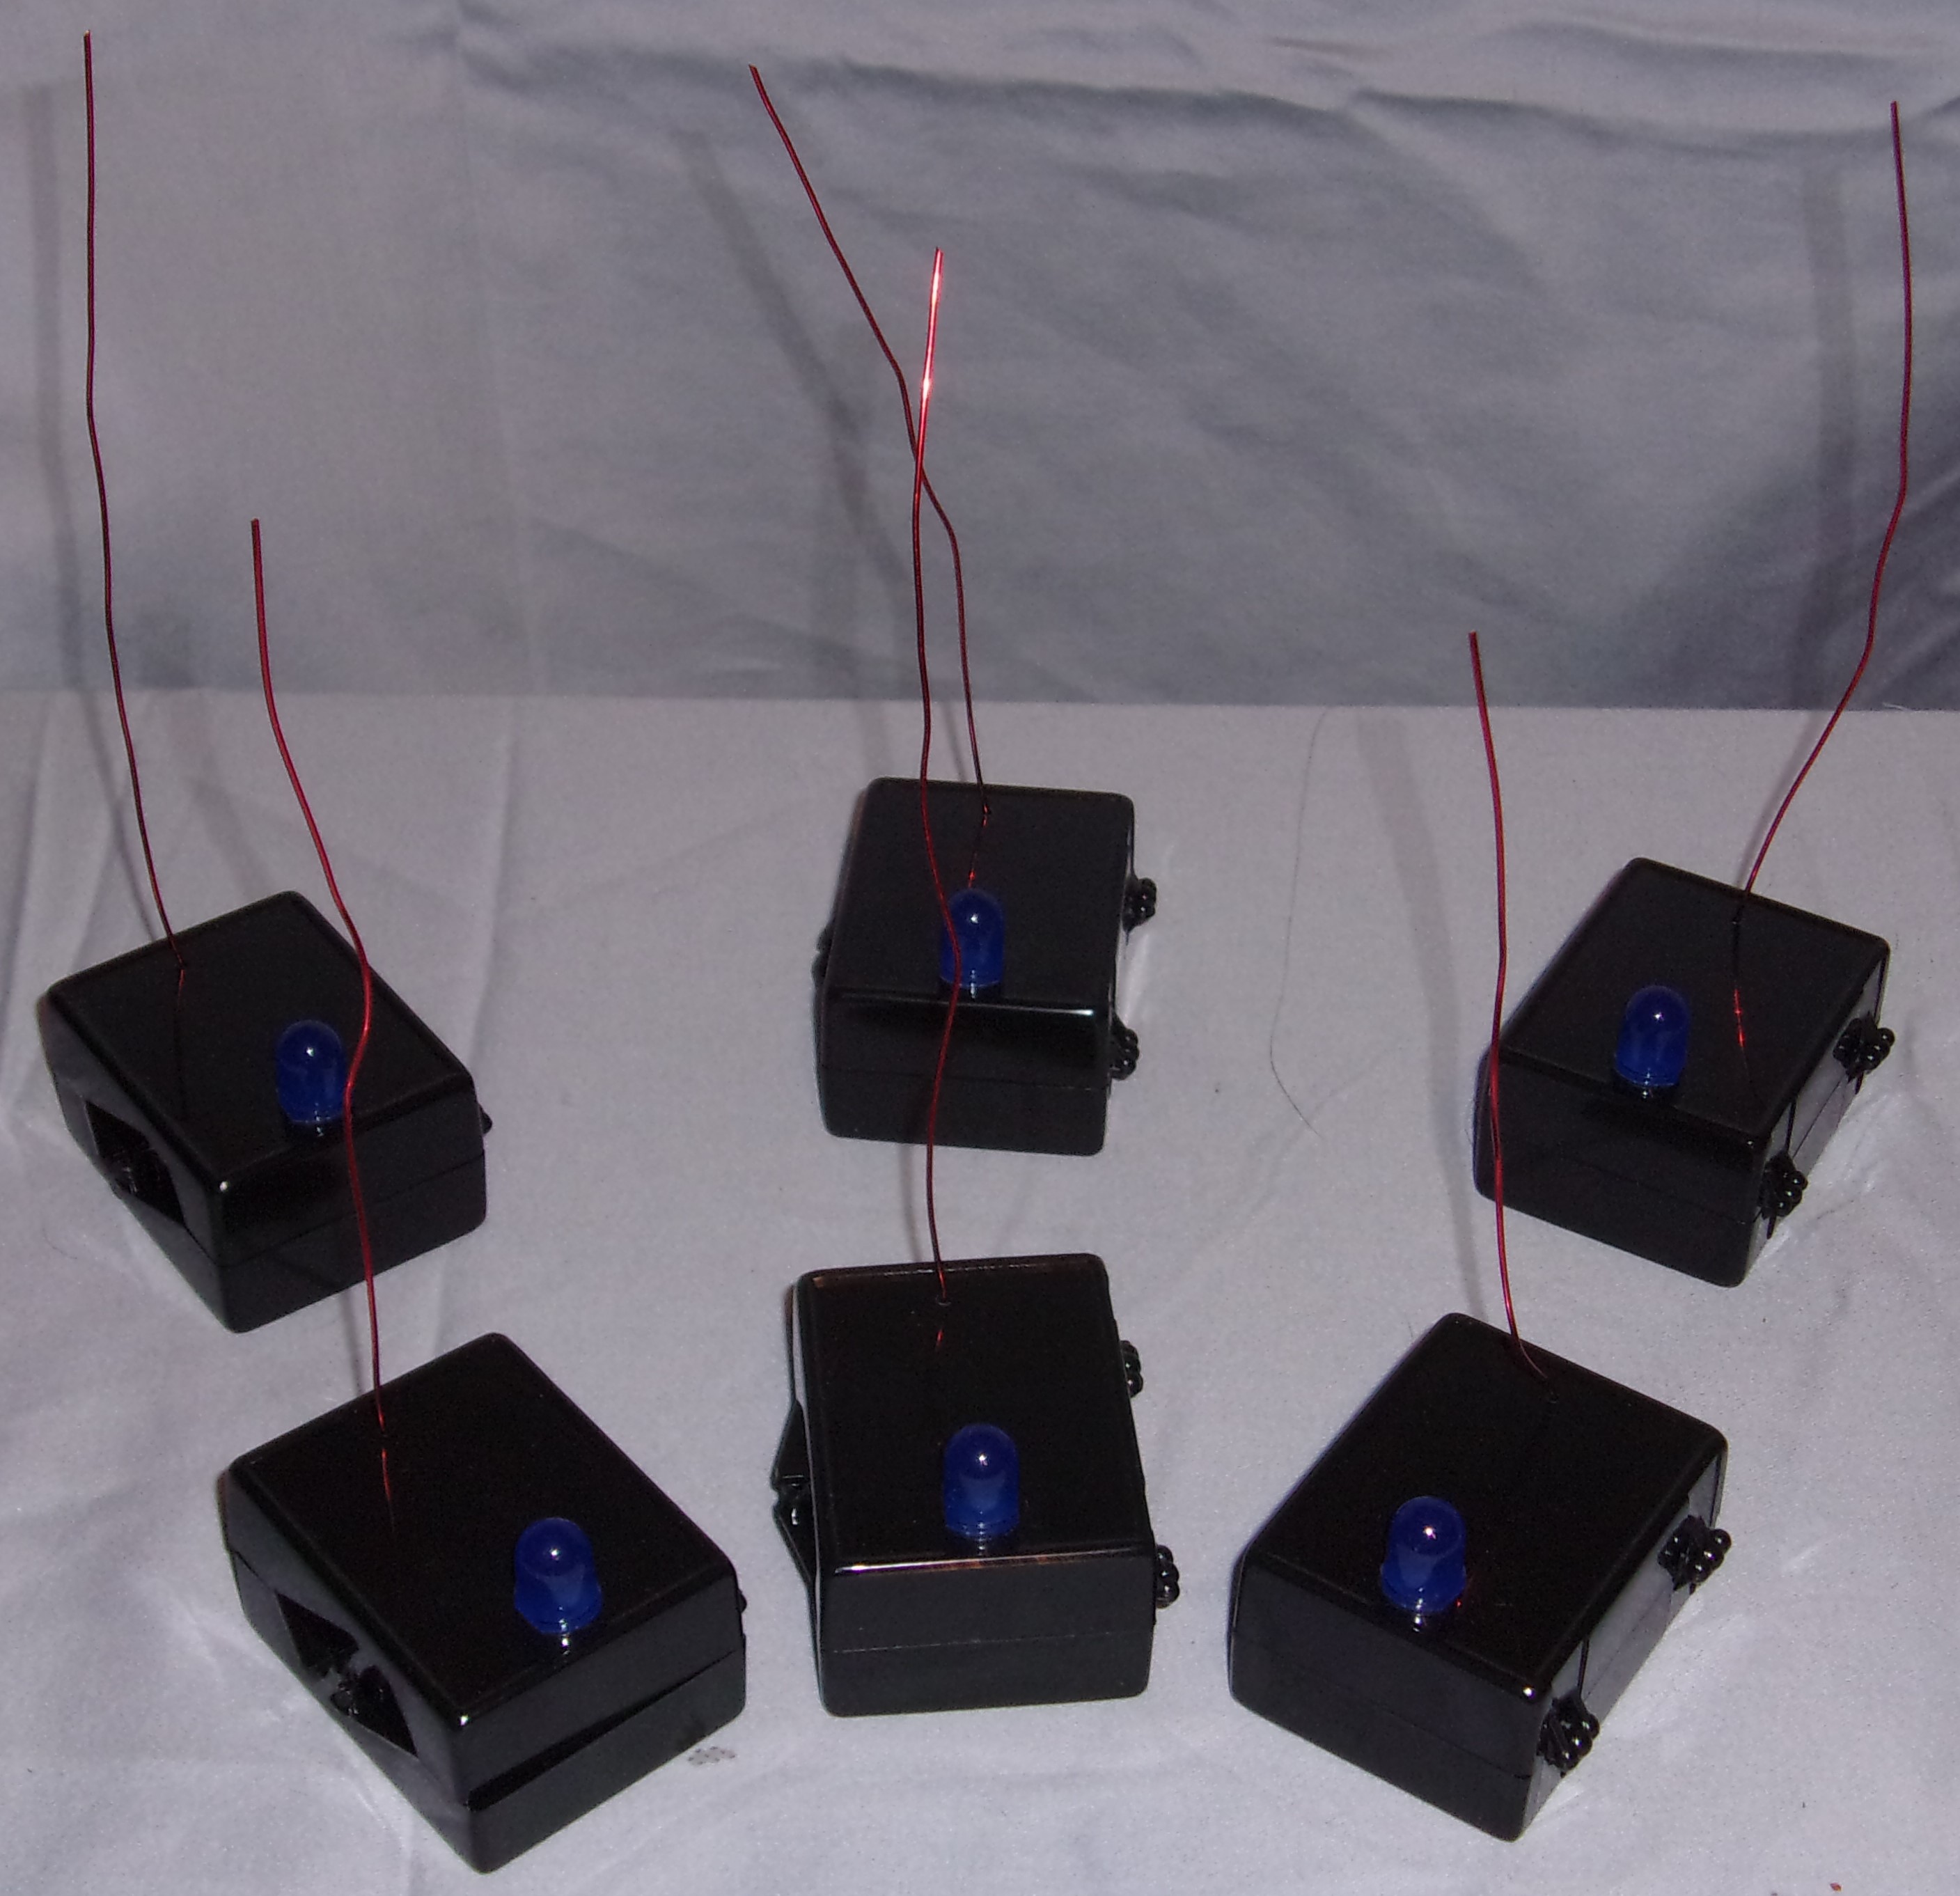
EMF Sensor Array Uses the Electromagnetic Field theory.How to use:
The theory is that when a spirit moves by, or touches one of the sensors, the device will light up blue.Each sensor works independently of each other.
1. Position each piece's antenna as desired.
2. Insert a 9v battery into each unit to turn on each sensor, and place in desired locations and observe.
NOTE: The EMF Sensor Array is undergoing field testing to determine its value and practicality during investigations.
The EMF Sensors in this Array do not make noise, they only light up with a blue LED.

History behind the use of this equipment:
White Sage and Torch Was widely used by Native American groups on the Pacific coast of the United States.Characteristics:
For hundreds of years, white sage has been considered a sacred, cleansing, purifying, and protective plant.
As the smoke moves through the room or over a surface, the smoke attaches itself to any heavy, negative energy that is within the space, object, or being.
Sage is a powerful tool that can drive away evil when "Used Properly". It will drive away evil spirits that are not connected to a place or spot; but if the spirits already have a foothold in someone's house, it will only serve to weaken them and purify the house, causing them to have to retake the house again. It will not drive them away entirely. The attachment may require multiple uses of white sage to keep the evil spirit in a weakened state.
It is only part of the solution, not the entire solution."Unremarkable"How to use:More research into proper use is required at this time.

Theory behind the use of this equipment:
Structured Light Sensor "SLS" Camera This camera uses infrared to track and detect entities and have them appear on the camera screen as stick figures by projecting an array of dots out into the environment.
How to use:1. Assemble the camera and connect the wires appropriately.
2. Turn on the camera.
3. Turn on the pad.
4. Open the program "".
5. Optional: To record on the tablet itself, open the screen capture program "".
NOTE: DO NOT turn on the wifi or connect to a computer. DO NOT update tablet software.
Using screen capture will drain camera battery faster.
External recording device may be required.